Thursday, January 26, 2023

The Confusing Point Blank: It’s Farther Than you can Toss a Biscuit

Few terms relating to rifle marksmanship are as misunderstood today as the point blank, and yet understanding it is absolutely essential for understanding marksmanship with black-powder rifles of the nineteenth century.  Most people today mistakenly use the term to mean a range which is so short that you can’t miss, or as one historical novelist liked to put it, “only a biscuit toss away.”  As we shall see, there was confusion about the term even in period, but the biscuit toss definition has never applied to the term point blank in any source.  In this essay we will examine what the term actually means, how it was used in period (both correctly and incorrectly), and why it is important to modern historical shooters.


Let’s begin with the correct definition:  The point blank is the second point at which the trajectory of a bullet crosses the line of sight of a firearm for any given sight setting, as shown in the figure above.  When shooting a rifle with a hausse (a rear sight which is adjustable for elevation) there will be a different point blank for each sight setting of the hausse.  Thus, with the hausse folded down and set at its lowest setting, which is the 100 yard setting on most rifles, if you aim at a target, the bullet will hit the mark at which you aim at 100 yards; if you use that same setting and the target is slightly closer than 100 yards the bullet will hit slightly above the mark because it hasn’t dropped down to the point blank yet, and if the target is slightly beyond 100 yards the bullet will hit slightly below the mark.  If you raise the sight setting to 200 yards, the bullet will hit the mark if the target is at 200 yards, and so on, for each sight setting.

NB:  This assumes that the shooter is shooting ammunition with the correct load for the period and weapon in question; when loading ammunition today your hausse settings will probably not match the ballistics of your homemade ammunition, so you have to experiment to see how your ammunition performs.

Moreover, we know that this definition was used by both American and British sources of the period.  In Heth’s 1862 A System of Target Practice for the use of Troops (p. 17) he wrote:  “[P]oint-blank (V) is the second intersection of the trajectory (T K), or curve, with the line of sight.” And provided this illustration:


Likewise, Wilcox in his 1859 An Elementary Treatise Upon the Theory of Rifle Firing (p. 48): “Beyond the point L the trajectory rises above the line of sight for some distance, then it falls and cuts it again at V. This second point of intersection is called the point blank; the distance CV of the point blank from the muzzle, is called the range of the point blank…”


In Congdon’s 1864 Cavalry Compendium (p. 35), he says “When fired from a gun, the ball crosses above the line of sight; after going a certain distance—according to the arm used—it crosses below the line of sight: this point is called the point-blank."

In Cleveland’s 1864 Hints to Riflemen (p. 28) he says: “The point at which the trajectory intersects the line of sight, is called the “point blank,” and may be varied by elevating or depressing the after sight...”

British rifle sources used the same definition.  While Busk doesn’t show an illustration, he describes exactly the same effect on pp. 55-56 of his 1860 Handbook for Hythe: “The object of the marksman is to make the point blank of his rifle as nearly as possible coincident with the object to be struck... In order to ensure striking an object within the point blank, we must aim under it, if the object to be struck is beyond the point blank, we must sight above it.”

In Thackery’s The Soldier’s Manual of Rifle Firing from 1854 (pp. 19-20), he says: “The
point where the trajectory the second time crosses the line of vision (figs. I., III.) is called the point-blank range, which should be the centre of the object to be struck.”


As this shows, the term point blank was used quite consistently by most sources from the period, however, there was some confusion about the term, too.  In Walker’s 1864 The Rifle, Its Theory and Practice (p. 86), he said that British artillerists had a different definition of point blank:  “This is the correct explanation of point-blank, and the one adopted in the French service and abroad generally; but unfortunately English artillerists have another acceptation of the term, viz., that it means the “first graze” [i.e., the range at which a round will hit at the foot a target soldier for any given sight setting—HTK] of a bullet fired from the shoulder, the axis of the piece or firearm having been kept horizontal," a definition which might make sense for an artillerist who is concerned with artillery rounds which were often intended to hit the ground and bound across it to take to multiple targets.  Notwithstanding the vagaries of artillerists, Walker holds the same definition for point blank, as applied to rifles, as seen in this essay, i.e., the second point at which the bullet crosses the line of sight, or point “E” in figure 20 below from p. 84 of his book.  “After culminating it makes a gradual descent till it again cuts the line of sight at the point E. This point of intersection of the trajectory with the line of sight is of important interest.  It constitutes what is termed “the point blank…” (p. 85).
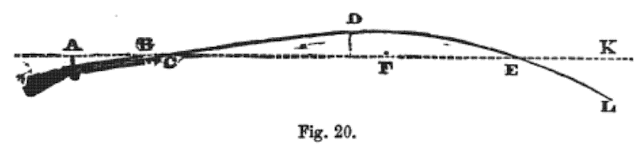

Nor are we alone today in misunderstanding the term—people got it wrong in the nineteenth century, too.  In Freemantle’s 1901 The Book of the Rifle (pp. 312-313), he spends considerable time trying to dissuade people from using the term point blank, but this is largely because people misunderstood it.  He says that the ignorant call point blank the “distance which a bullet travels before it has dropped any appreciable amount.”  Obviously, he says, this is wrong since the bullet follows a parabolic trajectory, but if you think about what they are saying with this inaccurate definition it amounts to what our sources said above:  It is the range at which it appears not to drop any appreciable amount because it is the point at which the line of sight crosses the trajectory of the bullet for any given sight setting—in other words, the bullet seems to fly in a straight line to the point of aim, but only because the shooter can’t see the parabolic trajectory. 

The reason the concept of the point blank is so important is because of the extreme parabolic curve of the bullet trajectories of black-powder rifles.  With our modern rifles we (mistakenly) expect the kind of absolutely flat trajectories people thought they were getting in Freemantle’s complaint, but at longer ranges black-powder bullets can easily miss a target entirely unless the range is estimated correctly.  For example, with the .577 Snider-Enfield rifle with the hausse set for 600 yards, the greatest height of the trajectory of the bullet will be 23 feet above the ground.  At that sight setting, the bullet will hit an enemy infantryman who is 6 feet tall in the head (this is termed the “first catch”) if he is 585 yards away, in the waist (which is the point of aim) if he is at 600 yards (this is the point blank), and in the foot if he is at 615 yards (this is “first graze”) (1870 Musketry Instruction p. 35).  Thus, when a shooter aims for his opponent’s waist using the 600-yard setting of his hausse he will hit an infantryman somewhere on his body, from the top of his head to his foot, only if that enemy is between 585 and 615 yards away; this is called the “margin” in most British musketry manuals, or the “dangerous space” in other sources.  That means a shooter has to be able to estimate the range to his target to within 30 yards in order to make a hit at 600 yards.  From this, the reason the point blank is so important should be obvious:  Without understanding it, effective marksmanship at anything other than short ranges is impossible.  This is a central principle of black-powder shooting, and one which every historical shooter must understand.


Tuesday, January 17, 2023

Working Up a Load

Every weapon shoots a little differently, and, of course, every different bullet and/or powder load will affect accuracy as well. If a shooter only wants to shoot the typical government load for his weapon in an effort to recreate its operation as authentically as possible then working up a load is not necessary and he can simply work on improving his accuracy with that load, but if he wants to find the most precise load for his specific piece then this procedure will help determine what works best.

Working up a load refers to the process of testing various combinations of loads until one is found that reliably produces the best Figure of Merit (to learn about the FoM and how to calculate it see historicalshooting.blogspot.com/2021/01/calculating-figure-of-merit.html). Many shooters only consider group size, but as the essay linked above will show, the FoM is much more useful for this.  Once that is determined the shooter can work on adjusting his sights and/or aiming off in order to bring his Mean Point of Impact to the Intended Mean Point of Impact.

Sample chart.

To work up a load, prepare several batches of ammunition. The powder used (Swiss, Schuetzen, Goex, Pyrodex, etc.), the granulation of the powder (1F, 2F, 3F, etc.), any filler used to fill the case (wool, corn meal, etc.), whether grease cookies ae used or not, and the bullet type can all be varied, but only change one thing in every batch. Each batch should have at least five rounds in it; the commonly seen three-round batches are statistically insufficient, and ten rounds would be even more precise (see youtu.be/Ahp_bw5ZGjk).

Make a chart listing each load, as shown above. In this example, we consider two kinds of bullets (ring-tailed and Richmond Labs) with two different kinds of powder (Swiss and Schuetzen) and three different powder loads (55, 60, or 65 grains of each brand) for the 1859 Sharps Infantry Rifle.  Of course, this can be expanded with many different loads, but that will require a lot more test batches of at least five rounds each—this chart should only be seen as an example. Then, too, the test can be conducted at different ranges since a load that shoots well at 100 yards may not do so at 500 yards, so a completely different chart would have to be prepared. As this makes plain, the working-up process can be extremely involved and require a lot of ammunition; note that just working through the chart shown will require 60 rounds.

Next, take the chart and the ammunition (clearly marked) to the range. Since this is a test of precision rather than of accuracy (i.e., how the ammunition shoots from a given piece rather than how well the shooter shoots), all firing should be done using a rest to take the human factor out of the equation as much as possible. Make certain to use exactly the same Point of Aim and Sight Picture for each shot.  Calculate the Figure of Merit (see the link above) for each table of fire (in other words, each five-round test batch) and it will be obvious which load works best for that firearm at that range. Once the optimum load has been determined the sights can be adjusted and/or the principles of aiming off can be used in order to bring the Mean Point of Impact as close as possible to the Intended Mean Point of Impact with every round. After that, it’s a simple question of frequent, consistent practice to improve the results.

Sunday, December 4, 2022

The Snider-Enfield Position Drill

Introduction
British musketry training of the nineteenth century took recruits through a very specific set of exercises to teach them how to shoot before they fired a single live cartridge.  First the recruit was taught to clean, maintain, and operate his weapon, then he was taught the theoretical principles of musketry, then he was trained in the three critical drills of musketry:  The Position Drill, The Aiming Drill, and the Judging Distance Drill.  The latter two drills we will reserve for a later post (or wait for my forthcoming book on Snider musketry), but here we will demonstrate the Position Drill.  All of this material is taken directly from the 1870 Musketry Instruction.


In this exercise the recruit, as well as the drilled soldier, is to be put through all the motions of firing, standing and kneeling, with the same accuracy as if actually firing ball, close attention being paid to each motion, the object being to habituate him to the correct position, to give him a perfect command of his rifle, and to establish the connection that should exist between the hand and the eye. The eye regulates every action of the hand, but constant practice is required to enable the latter readily to raise the rifle to an object on which the eye may be fixed, and the forefinger to act upon the trigger at the proper moment.

The position drill was considered the single most important drill of all that were instructed at the School of Musketry at Hythe. General Hay, the commander of the School of Musketry at Hythe, would say ‘A man may be taught to shoot by drill alone, if he can but be brought to faith in the theory.’ Today we would call the Position Drill basic good shooting fundamentals. The key to the Position Drill, and indeed the key to good shooting in 1859 or today, is consistency. Good shooting comes from doing the same thing, every single time. Soldiers would practice the Position Drill over and over, until they had absolute mastery over their rifle.

“The objective of the Position Drill, being the most important of all the drills taught at Hythe, was to establish an instantaneous connection between the soldier’s eye and finger. The soldier was placed in, and habituated to, the best position for independent firing, as if actually firing live cartridges. Instructors paid extremely close attention to every motion of the Position Drill. General Hay himself would walk the line during the instruction of the Position Drill, ‘pointing out even the most apparently trivial defects.’ The Position drill is so sure an index of shooting that the officer instructors at Hythe could tell who would shoot well with live ammunition simply by observing how well they performed the Position Drill. (Gibbons, Brett A. Handbook for the School of Musketry. Privately Published, 2018, pp. 18-19.)

First Practice
This practice is intended to accustom the soldier to handle his rifle expertly, to strengthen his left arm so as to give him a perfect command of the rifle with the left hand, and to habituate him to raise it to the shoulder, in the direction of the object the eyes are fixed upon, without moving his body. It is therefore to be continued until these points are accomplished. No defect, however trivial, is to be overlooked, and the instructor is to explain the errors, and their bad effects, when the squad is standing at ease.

Order Arms.

The Instructor commands:
At ---- yards, Ready.
As per regulation in the Platoon Exercise.

  • Adjust the rear sight with the fingers of the right hand.
  • Bring the hammer to full cock with the right hand.
  • Return to the Ready, eyes directed at a target.

At --- yards, Ready.

The instructor is to be most particular in this, and the following practices, to see that every man holds his rifle firmly with the left hand, at the place where it is to be held when at the “present,” viz., behind the lower band, and not nearer the nipple than the projection in front of the lockplate; that the fingers of the right hand are behind the trigger guard, that the body is erect, the left side being perpendicular, with the left breast over the left foot, that the shoulders are at the half face, and the feet at right angles, and that the eyes are fixed on the mark, or object in front, with the head in the same direction, and erect.

Present.
Without in the slightest degree moving the body, head, or eye raise the rifle smartly to the front of the right shoulder to the full extent of the left arm, the arms to move close to the body, the back sight to be upright, the top part of the heel plate to be in a line with the top part of the shoulder, the muzzle to point a few inches below the mark the eyes are fixed upon, the forefinger placed inside the trigger guard, and both elbows inclined downwards.

Present.

The squad is frequently to be brought back to the Ready by the command as you were in order to establish the men in the position above detailed, to point out errors, and to explain the subsequent motions of the practice: e.g., Present. As you were. Present. As you were, and so on, until the first motion is performed satisfactorily, when the second and third motions are to be similarly explained, and afterwards the following commands to be given: Present – Two – Three.

Two.
Bring the rifle smartly into the hollow of right shoulder, which must not be allowed to give way, pressing it thereto with the left hand, and at the same instant bring the left elbow under the rifle, and the right elbow nearly square with, and well to the front of the right shoulder, to form a bed for the butt, without moving the body, head, or eye, placing the forefinger round the trigger like a hook, but without pressing it.

Two.

Three.
Bring the rifle smartly to the ready position, without moving the body, head, or eye, placing the forefinger at the same time behind the trigger guard.

Three.

Ease springs.  Order Arms.  Stand at ease.
As per regulations.

Ease springs.  Order Arms.

Second Practice
This is much the same as the First Practice, except this time when the soldier comes to Present he is to raise the muzzle until he has a good sight picture and then dry fire his piece.

Position drill, by numbers, Second Practice, as a front rank standing.
At ---- yards, Ready.
As per regulations in the Platoon Exercise.

Ready.

Present.
Combine the actions of the first practice above into a single action and look at the target through the rear sight aperture.

Present.

Two.
Raise the muzzle steadily until the top of the foresight is brought in a line with the object through the notch of the backsight, pressing the trigger at the same time, without the least motion of the hand, eye, or arm, until the hammer falls [i.e., dry firing the piece], still keeping the eye fixed on the object. The breathing to be restrained in performing this motion.  Note that this is performed with an unloaded rifle with the snap cap in place to allow dry firing.

Two.

Three.
Bring the rifle to the ready position and “full cock” in order to prepare to conduct the drill again.

Three.

Ease springs. Order arms. Stand at ease.
As per regulations.

Order arms.

Third Practice
There is a Third Practice as well, but it differs from the second only in being done continuously at the soldier's own time.

Monday, November 28, 2022

Loading .45 Colt Ammunition

Edit 30MAY2025:
I have updated this post to include ballistic data regarding my cartridges.

Edit 28JUL2023:
I have recently acquired a custom mold from Accurate Molds which produces a bullet that is much closer to the design of original .45 Colt ammunition (see the link HERE) to replace the RNFP Lee bullet mold I was using previously.  This mold is of superior quality, and it significantly changes the cartridges so I have updated this post to reflect that change.

Colt 1860 Cartridge Conversion revolver with Frankford cartridge packets and loose rounds.
Remington New Model Army with 5-in. barrel and a Howell .45 Colt conversion cylinder.  Note that the web on the loading lever has been reshaped to make it look like the originals.

Introduction
The .45 Colt cartridge was developed jointly by Colt’s Patent Firearms Manufacturing Company of Hartford, CT, and the Union Metallic Cartridge Company of Bridgeport, CT, and was ready for testing by 1872.  The M1873 cartridge had an internally lubricated two-groove, hollow-based, soft-lead bullet that weighed 250-255 grains over 30 grains of 2F (not 3F as we would expect) black powder.  These first military cartridges used the Bénet priming system which held priming compound between the case and a small brass insert; from the outside they look like rimfire cartridges, but aren’t (see the photo and schematic below), although external primers were used in some commercial cartridges.  These cartridges are impossible for me to duplicate, so I use regular Boxer-style primers as in the civilian case also depicted below.  Later military cartridges lightened this charge to 28 grains of 2F black powder under a 230-grain bullet, and the M1882 et seq. used an external primer rather than the Benet style (Kuhnhausen, Jerry, The Colt Single Action Revolvers. McCall, ID: Heritage Gun Books, 2001 p. 23).  The M1882 cartridge had a muzzle velocity of 730 f.p.s. with a 235-grain bullet for a muzzle energy of 278 ft-lbs. when fired from the Colt Single-Action Army (id. p. 15).

 Early military .45 copper Colt cartridges with the Bénet primer. (Left, M1873 Colt, center and right, Schofield .45 Short Colt.)
Original cartridges.

My.45 Colt Load
I purchased a custom mold from Accurate Bullet Molds which produces 0.454 in., 255-grain RNFP bullets when cast from a mixture of 20:1 lead to tin.  These bullets are very close to correct but differ from the original in two respects.  First, the Accurate bullet has a crimp groove while the original does not, and second, the original has a hollow base, which these do not.  The originals didn’t use a crimp groove for reasons which are obscure, but appear to be related to the difficulty of mass production of metallic cartridges in period.  The hollow base can’t be easily replicated by the method Accurate Bullet Molds uses to make their molds since it requires a special insert, but it turns out to be unnecessary.  The original bullet was .452 (to make it easier to load into early loading machinery) and it was felt that the hollow base would be necessary for the bullet to obturate into the rifling, but since the Accurate bullet is .454 it doesn’t need to obturate for proper fit so there is no need for a hollow base.  I use 30 grains of Swiss 3F powder in Starline shells with CCI large pistol primers and do not use any cards or wads over the powder. 

When fired from my Remington New Model Army conversion revolver with an 8-in. barrel the average Muzzle Velocity of my cartridges is 906.2 f.p.s., giving a Muzzle Energy of 465 ft.-lbs.  When using the same model of revolver with a 5-in. barrel I got a muzzle velocity of 872.2 f.p.s., for a Muzzle Energy of 383 ft.-lbs. (to those who don't think black-powder can be effective, note that government-issue .45 ACP FMJ ammunition has a muzzle energy of 360 ft.-lbs. when fired from an M1911A1 pistol, so even the 5-in. barrel provides 23 ft.-lbs. more energy than the government load!).

This picture shows one of the new bullets compared to the diagram of an M1873.  As should be obvious, it is a very close match with two differences:  First, the original bullets didn't have a crimp groove, and they had a hollow in the base.  Less obvious is that the originals were .452 in diameter, while mine are .454.  The originals were made that size to make loading them into the cases easier using the machines of the period, and this reduced size was the reason for the hollow bases, which helped the bullet obturate more to fit the bore.  Since my bullets are slightly larger they don't need the hollow base.

Comparing my new bullets with an M1873.
One of the new cartridges with a package of its fellows.

Loading Procedure
1.  I have covered the procedure for casting and greasing bullets extensively in other blog posts so I won’t go over it again here except to say I pan-grease the bullets in an 8:1 ratio of lamb tallow and beeswax.  The bullets come out of the mold at .454 in. and I do not size them.  (NB:  Most of the pictures below show the older RNFP Lee bullets I used formerly unless captioned otherwise, but the procedure is identical.)

2.  After shooting I immediately soak the shells in a mixture of white vinegar and water for ten minutes to neutralize the salts from the black powder, then I soak them in a mixture of hot water and dish soap for an initial cleaning.  I then tumble the shells to clean them.

Starline brass.

3.  I use a Lee progressive reloading press and a set of Lee carbide dies, which includes a sizing and de-capping die, a powder-through case mouth expansion die, and a bullet seating and crimping die.  There are several other kinds of die sets available, some with separate dies for bullet seating and crimping—follow the manufacturer’s instructions for them.  Be sure to insert the shell holder into the slot on the ram before loading in order to hold he shell securely during the loading process.

Before starting to load it is necessary to set up the dies.  Here are videos from Lee showing how to do so:
Sizing and de-capping die:  https://youtu.be/VKRkNWbHKwc
Case-mouth expansion die:  https://youtu.be/7j2I2FEZKsM
Crimping and bullet seating die:  https://youtu.be/lF5h5GyzyKQ

Lee die set:  Three dies, priming tool/capper, shell holder, and a Lee dipper.

The key to setting up the dies is to follow the instructions carefully and to start with the most minimal positions for each die, then adjust the position of the die in very small increments.  Adjust the die, try it, check the result, and make very tiny changes, trying the result each time until you get exactly the results you want.  Making big adjustments can result in your brass being worked too much, which can cause it to fail, or flared too much, which can cause the brass to be damaged by the next die.  I start with one shell, checking each stage of the process and making sure it’s perfect before tightening down the die and going on to the next stage.  I don’t start regular rapid production until I have the dies perfectly set and locked down and have produced one perfect cartridge.

The Lee loading press set up with all dies in place.

4.  The sizing and de-capping die reshapes the entire shell body which will have expanded when fired and also de-caps the spent primer in the same action.  Although I use carbide dies, I still lubricate each shell very lightly before starting.  If your dies are not carbide, lubricating the shells is important to prevent them from becoming stuck in the die.

A shell in the shell holder ready for loading.

5.  I have a capping tool which fits onto the shaft of my reloading press.  When the ram is fully raised to size the case, I insert a primer into the cup on the capper with the open end of the primer facing up.  Then I lower the ram which moves the capper under the shell and press the ram down very firmly to seat the primer.  I raise the ram up slightly and check to make sure the primer is no longer in the capper, then remove the shell and run my finger along the base to ensure that the primer is seated properly.  The primer face should be just slightly below the base of the shell or it may catch on the wall of the revolver and prevent the cylinder from rotating properly.  If it isn’t right, I just lower the lever again and set it a bit more firmly.

The ram fully up into the resizing die and a primer in the capping tool.
Checking the seating of the primer.

6.  The case mouth expansion die opens the case mouth very slightly to allow the bullet to be settled into it.  Flare the mouth of the case the absolute minimum possible; the bullet should just barely fit into the top of the case mouth.  Too little flare and the bullet may get shaved by the seating die; too much flare and the seating die may crumple the shell edge, making it unusable.  The bullet only needs to sit a small fraction of an inch inside the case mouth—no more.

The Lee expansion die is open from the top, so I put a powder funnel on it then pour a measured charge of powder down through into the shell while it is still in the die.  I use a Lee 1.9 cc dipper which measures 30 grains of Swiss 3F powder.  After dumping the powder I tap upward on the lever of the press a few times to ensure all of the powder has gone into the shell.  Some brands of dies do not have this feature, so if you have one of these you will have to remove the case and fill it with powder before proceeding.  After pouring the powder I lower the ram and look inside the case to make sure the powder is actually in it and that it looks about right.

Adding the powder through the powder funnel.

7.  With the ram fully down, I insert a greased bullet into the case mouth, trying to ensure it is not canted off center.  I then drive the shell up into the die, which will seat and crimp the bullet in one step.  A certain amount of crimping is essential or else the bullets may walk themselves out of their shells because of the recoil when the revolver is fired.  There is a degree of controversy, however, as to how much crimping is necessary.  Some experts argue that you should crimp just enough to hold the bullet in, and no more, since the more you crimp the more you work the case mouth, which can cause it to fail sooner.  Others argue that while that is true when shooting smokeless powder, when shooting black powder (which I do) a more significant amount of crimping is called for to give the powder time to produce enough pressure before the bullet starts to move.  Exactly how much of a crimp you want will require some experimentation, but generally speaking you want enough to roll over and completely cover the crimp ring on the bullet, but not so much that it digs into the lead and cuts another groove.

A bullet set into the flared case mouth.
A seated and crimped bullet in the cartridge.

Inspection
When I have completed a cartridge, I wipe it carefully with a rag to remove any excess lube or grease, then inspect it carefully.  I look for any ballooning of the case, to see whether the primer has backed out at all, to see if there are any cracks of flaws in the brass, and to see that the crimp looks good.  After that I measure the overall length of the cartridge with a caliper because the bullet may protrude from the cylinder and prevent it from rotating if the OAL is too great.  While the maximum length of a .45 Colt cartridge should be 1.6 in. or less (according to the Lee load data), your revolver may require something shorter, so check to be sure.  I set my bullet-seating die so that the overall length I get is 1.58 in. exactly; this seems to work well for me, and puts the crimp right on the crimp ring of the bullet; again, with other bullets your experience may differ.  I also insert each round into the chamber of a cylinder (after removing it from the revolver) to ensure it fits correctly and isn’t swollen at any point.  I inspect and measure every single cartridge because although it’s tempting to just crank them out your dies may move slightly during the loading process which could cause a bad result.  Take your time, be careful, and check your results—bad ammo can be very dangerous.
Measuring and inspecting the finished rounds.

Finished new-style cartridges ready for packaging.

Packaging
As readers of this blog will know, it’s not enough to make the ammunition, it also has to be packaged correctly.  I have a reproduction 50-round box for cartridges, but I find it to be something of a pain.  It looks good and is convenient, but after firing a few cylinders the loose cartridges start to just roll around in the box.  To get around this problem I made a set of smaller 12-round boxes to copy those issued by the Frankford Arsenal, and I find they work much better.  I measured a single round and used those measurements to design a box pattern which I print, glue to a piece of light cardboard, then cut out.  I glue the box together, insert the cartridges (with a piece of cardboard between the rows), close the box, and wrap it with a wrapper I designed to match the originals.  The original wrappers were shellacked after being wrapped, but I don’t bother with this step since I don’t shoot in the rain.

An original Frankford Arsenal package from 1874.
My custom box loaded with 12 cartridges.
The cartridge package in its wrapper.

Disclaimer
This essay is not intended to teach anyone how to load ammunition, only to show how I do it for my revolver.  Loading ammunition incorrectly can cause serious injury or death, so do not rely on anyone else for information about how you load your ammunition, always rely on the recommendations of your firearm manufacturer and on officially published load data rather than on the words of some random stranger on the Internet.  Every firearm is different, and a load that works well in one revolver may not work well in another and every component can affect that load.  Learn to take responsibility for yourself and not to blame others for your actions. 


Sunday, October 30, 2022

Range Report 30OCT2022: Pedersoli 1859 Sharps Infantry Rifle


My 1859 Sharps Infantry Rifle.
Those who know me will be aware that I have been having a great deal of frustration getting my new Sharps to function.  I bought this rifle second hand, new ones being incredibly hard to find.  It had already had a breech-block conversion by Charlie Hahn of Hahn Machine Works intended to reduce the typical Sharps gas problems, however, the man who had done so didn't order the replacement clean-out screw to go with it, and it was one of the Pedersoli screws which aren't long enough so I could not get the rifle to fire at all.  I contacted Mr. Hahn and ordered one of his stainless-steel clean-out screws, and this seemed to do the trick--I plugged the muzzle with a little light tissue and a cap was sufficient to blow the tissue out, which it would not do before.  This led me to have high hopes as I brought the rifle to the range today.

Conditions
Location:  Lytle Creek
Weather:  73 deg., sunny, wind 15 m.p.h. from 10:00, humidity 11%.
Shooting Position:  Seated unsupported.
Range:  50 yards.
Sight Picture:  Full sight, 6:00 hold.

Ammunition
I loaded 65 grains of Schuetzen 2F powder in linen shells with tissue paper bases and cornmeal filler.  I used 510-grain Eras Gone Richmond labs bullets I cast myself.  For detailed information about the ammunition and how I loaded it, see the article HERE.

Flat-based linen cartridges with Richmond Labs bullets.
Reproduction Sharps cartridge pack.

The String Test
The String Test is a method of gauging accuracy that was actually used during the Civil War and is vastly superior to simply measuring the group size since it takes both the group size and the distance from the mean center of the group to the bullseye into account in the same number, so it is a much more meaningful way to gauge your accuracy despite being incredibly easy to do.  All shooters, and certainly all historical shooters, should be using this test.  You can learn more about the String Test at the link HERE.

Table One
10 rounds, string measurement 44.0 in.
String Test:  4.4 in./rd.

Table One.
Table Two
8 rounds, string measurement 27.0 in.
String Test:  3.4 in./rd.

Table Two.
Table Three
8 rounds, string measurement 23.75 in.
String Test:  3.0 in./rd.

Table Three.

Conclusions
To say that today was filled with frustration would be an understatement.  First, the rifle would not fire unless I first filled the nipple with a few grains of 3F powder before capping (thank you David Teague!), and while that did work most of the time, it should not be necessary and it led to significant hangfires much of the time.  Many of the wider hits in the pictures above were the result of these hangfires.  Second, my chronograph was acting up, and I got some pretty ridiculous results on those occasions it didn't just say "Error."  Third, I forgot my glasses, so my sight picture was as much guesswork as it was good shooting.

On the other hand, the rifle did shoot, and, frankly, seemed to shoot fairly well.  The String Tests shown above aren't good at all, and fifty yards is a ludicrously short range, but then, my intention for today was simply to see if I could get the weapon to shoot at all (this was my third range trip with it, and I had yet to get single round to go off before).  I wasn't working very hard on good accuracy, and without my glasses such could never have happened regardless.  Moreover, many of the fliers that can be seen in the targets above were caused by the hangfires, and if those are removed from the string measurement we're actually looking at String Tests closer to 2-2.3 in./rd.; the rifle shoots slightly to the left, and when I'm really shooting for score I can aim off easily for that, which will reduce the score even more.

As an additional note, Sharps are notorious for having the escaping gas create fouling which binds up the breech, making it extremely difficult to open and close the action.  Thanks to the excellent breech block conversion by Charlie Hahn, I merely sprayed the action with Ballistol prior to shooting, and never had even the slightest problem with the action binding.

Tuesday, October 11, 2022

Loading Ammunition for the 1859 Sharps Rifle

I made a video showing this process in detail which can be found here: https://rumble.com/v2b5fvs-making-linen-cartridges-for-the-1859-sharps-infantry-rifle.html

Introduction
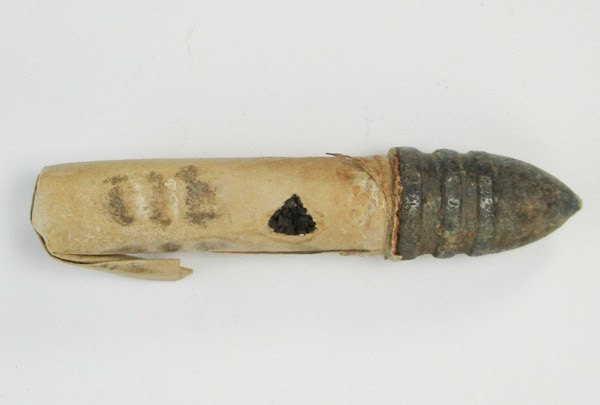
The first cartridges for the Sharps were made of paper which was tied to the base of a belted bullet, then the paper tube was filled with powder and the long end folded into a kind of tail.  The top edge of the breech was sharpened so that it would cut off the tail of the cartridge in order to expose the powder to the flame of the primer, but unfortunately this system was never very consistent and a great deal of powder could be lost when the tail was cut, resulting in poor accuracy.  The ringtail cartridges weighed 455 grains and were loaded with 65 grains of rifle powder (Thomas 2002 p. 188).

A ring-tailed cartridge.

The changes incorporated in the 1859 Sharps required a new style of paper cartridge with a flat base because the new blocks were not designed to cut the paper tail, and from 1860 all Federal arsenals produced flat-based cartridges (although Confederate arsenals continued to use ring-tailed cartridges) (Thomas 1998 p. 78/13).  Early versions were made of paper, but these were found to be too delicate for use in the field and so were replaced by linen for all cartridges made by the Sharps Company.  Most of the Federal arsenals switched to linen, too, but some continued to make cartridges of paper when linen was scarce until they were ordered to stop using paper in 1864 (id.).  Captain Thomas J. Wood of the 1st Cavalry Regiment wrote that:  “Owing to the great weight of the ball the attachment of the paper cylinder to it is not strong enough to resist the wear and tear of active service” (Thomas 2002 p. 197).  Major R.H.K. Whitely at the New York Arsenal wrote that:
…the making of Sharps Cartridges with paper must be abandoned and linen must be used in the formation of the cylinder.
More care cannot be taken in the making of the cartridges than is bestowed in the Laboratory.  The fact is that the ball is too heavy for the paper, and worse than that—the paper is sometimes softened by the lubric which causes it to break by the weight of the ball.  From this date I will make no more of paper, but I will make the powder cylinder of linen.” (id. p. 197.)

Flat-based linen Sharps cartridge.

Some modern sources are confused about the charge in Sharps ammunition, especially as to whether the carbines used different ammunition than the rifles.  The official Ordnance Department listing of ammunition for breechloading weapons says that the Sharps carbines and rifles used the same cartridges, and General Ripley of the Ordnance Department wrote a letter asking Col. George D. Ramsey of the Washington Arsenal about the difference between carbine and rifle ammunition:  “Is there any difference the Sharps rifle and the Sharps carbine cartridges as regards size of the ball and weight of the powder?”  Ramsey checked and replied that:  “Sharps rifle ball 458 grains, powder 62.4.  Sharps carbine 458.4, powder 63.6” (id. p. 200).

General Dudley of the Ordnance Department said that although 65 grains was the nominal charge it could vary from 63 to 68 grains (id. p. 207).  This load was important because testing showed that that was the charge necessary to make the weapon shoot to the graduations on the hausse.  In a letter from Major Benton of the Washington Arsenal to General Ramsey of the Ordnance Department, he wrote:
In answer to your letter of the 2d inst. I have to say that I have had numerous experiments made here with cartridges for the Sharps carbine, and it is found that 65 grains of musket powder are required to make the bullet hold up to the graduations on the sight. (id. p. 207. )

In testing, it was found that this load, when fired at pine boards 30 yards from the muzzle, would drive the bullet 9.23 inches deep (id. p. 207).

Looking at pictures of extant cartridge packets we see two different kinds in general use.  Both styles held ten linen cartridges with a paper tube containing 12 “top hat” musket caps.  John C. Palmer of the Sharps Company wrote to General Ripley of the Ord. Dpt.:  “We have adopted the system of packaging 12 Govt. Hat Caps in each box of ten cartridges, the box covered with a heavy coat of Waterproof Varnish” (id. p. 199).
Original cartridge pack.

Note:  I learned the method for making these cartridges by watching this video by Mike Beliveau:  https://rumble.com/v1j7dpb-making-linen-cartridges-for-the-1859-sharps.html

Chamber Length
There are several manufacturers of reproduction Sharps, and each of them have different chamber sizes, with some even changing over time, and all of them are different from the originals.  Since the  cartridges have to be an exact match for the chamber length, the first step is to determine the chamber length of your specific piece.

Start with a half-inch dowel about eight inches in length.  Glue a bullet to one end of the dowel (I had trouble getting the bullet to stay, so I ended up gluing it and then taping it as well), then insert it into the chamber of the rifle and mark the dowel at the end of the chamber.

Measure the distance from the line to the bottom of the driving band as shown in the picture below.  This measurement will be the length of the linen tube for the cartridge.
Chamber depth gauge.

Pattern Making
Begin by making the former that will be used to wrap the cartridges.  These can be made in two ways:  First, a half-inch dowel can be built up with tape until half of it is the same diameter as the base of the bullet to be used.  Second, start with a larger dowel and turn it down until one half of it matches the diameter of the bullet base and the other half is one half inch.  Either way, the idea is to end up with a former that is about eight inches long, with one half of its length being the diameter of the base of the bullet to be used and the other half being one half inch in diameter.  Ultimately, I ended up combining both methods since the turned former was slightly too small, so I added a layer of tape to bring it to the exact right size.  Lightly sand the smaller end of the former so it won’t rip the paper bases.

Cut a strip of paper the width of the chamber depth then wrap it around the large end of the mandrel so that it overlaps itself by about one  quarter of an inch and mark that.  Cut the strip at the point you marked and that will be the pattern for the shell template.  I used that to make a wooden block of the correct size because I find them easier to use than paper templates.
Forming mandrel and template.


The Bullets
I cast the bullets using an Eras Gone Bullet Molds Richmond Laboratory bullet mold (found here) from 100% pure lead.  These are slightly different from the bullets used by the Federal armories and contractors, which had an additional cannelure above the heel, but there are no molds for the correct bullets available, and these are, at least, period correct and very similar.
Richmond Labs Sharps bullets.


The Linen Shells
The exact type of linen used in Sharps cartridges is unclear, however, I have been informed that it most closely resembled drafting linen, a very fine linen that was used to make blueprints.  Unfortunately, drafting linen is no longer being manufactured (although pieces can sometimes be found online), so find a very fine linen.  I purchased mine from Burnley & Trowbridge Company (burnleyandtrowbridge.com) in Williamsburg, VA.  I purchased their “White Shirt/Shift Linen” ($17.00/yard in 2022).  This is a very fine 100% Irish linen, and they sell it in smaller pieces so that it isn’t necessary to buy it off the roll.  Any company which supplies fabric for high-end historical garments should be able to provide a similar product.

The linen, as it comes from the manufacturer, is not stiff enough to make good cartridges, so it needs to be sized.  Sizing is a starch-based product that gives fabric stiffness and body.  You can buy either liquid starch or wallpaper sizing; I first tried heavy-duty spray starch for ironing, but that proved unsatisfactory.  Follow the manufacturer’s directions for the sizing, then iron your fabric to get it to lie flat and smooth.

Since Sharps cartridges are straight walled rather than tapered, use a yard stick to mark a straight line across a length of the fabric, then use the template discussed above to mark the shells.  Cut them out with a pair of sharp scissors or a fabric cutter.

Take one of the linen shell blanks and wrap it snugly around the large side of the mandrel, taking care to make sure it lines up squarely.  Glue the edge of the shell and press it firmly into place; I roll the shell, while still on the mandrel, back and forth on a table to get a good seal.  I use a glue 
stick, but Elmer’s glue can be used as well, it just takes longer to dry.  Slide the shell off of the mandrel, set it aside, and let it dry completely.

Linen shells.
Using the mandrel to form the shells.

Formed shells.

The Bases
In period, currency paper was used for the bases, however, tissue paper is easier to find and use now (I use perm-wrap paper).  Purchase a 1.5-inch craft hole punch and use it to punch out multiple bases at one time.

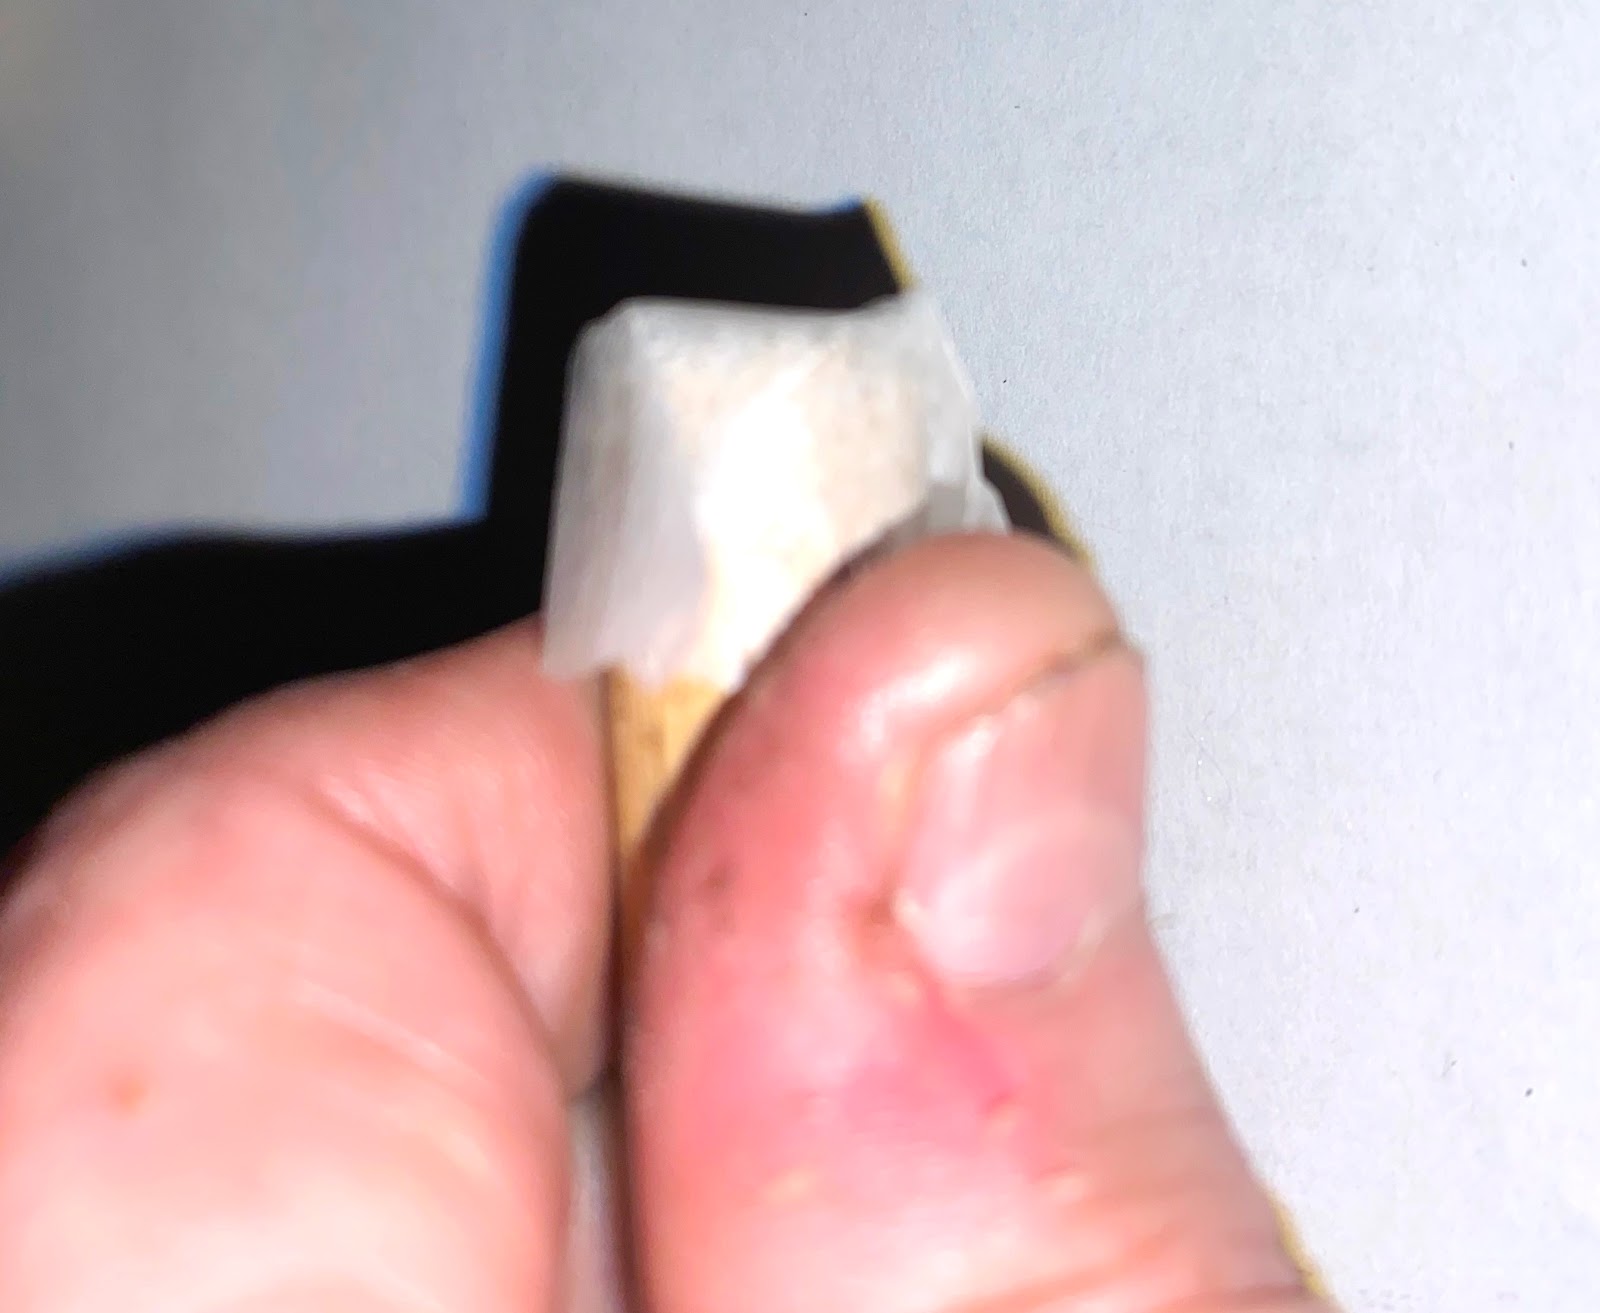
Once the shells are dry, center a tissue-paper base on the end of the smaller side of the mandrel and fold it evenly down over the mandrel.  Insert the mandrel, with the base still on the end, about halfway into the linen shell.  Use a small brush or the end of a Q-tip to apply a band of glue on the inside of the shell, then insert the mandrel the rest of the way into the shell until the base is flush with the end of the shell and press it gently against a table to make it even.  Gently squeeze the linen against the mandrel over the tissue-paper base to get the glue to stick well, then slide the mandrel out of the shell, leaving the base behind.  Set the shell aside and allow it to dry completely.

Hole punch for making the bases.
Tissue-paper base on the small end of the mandrel.

Filling the Cases
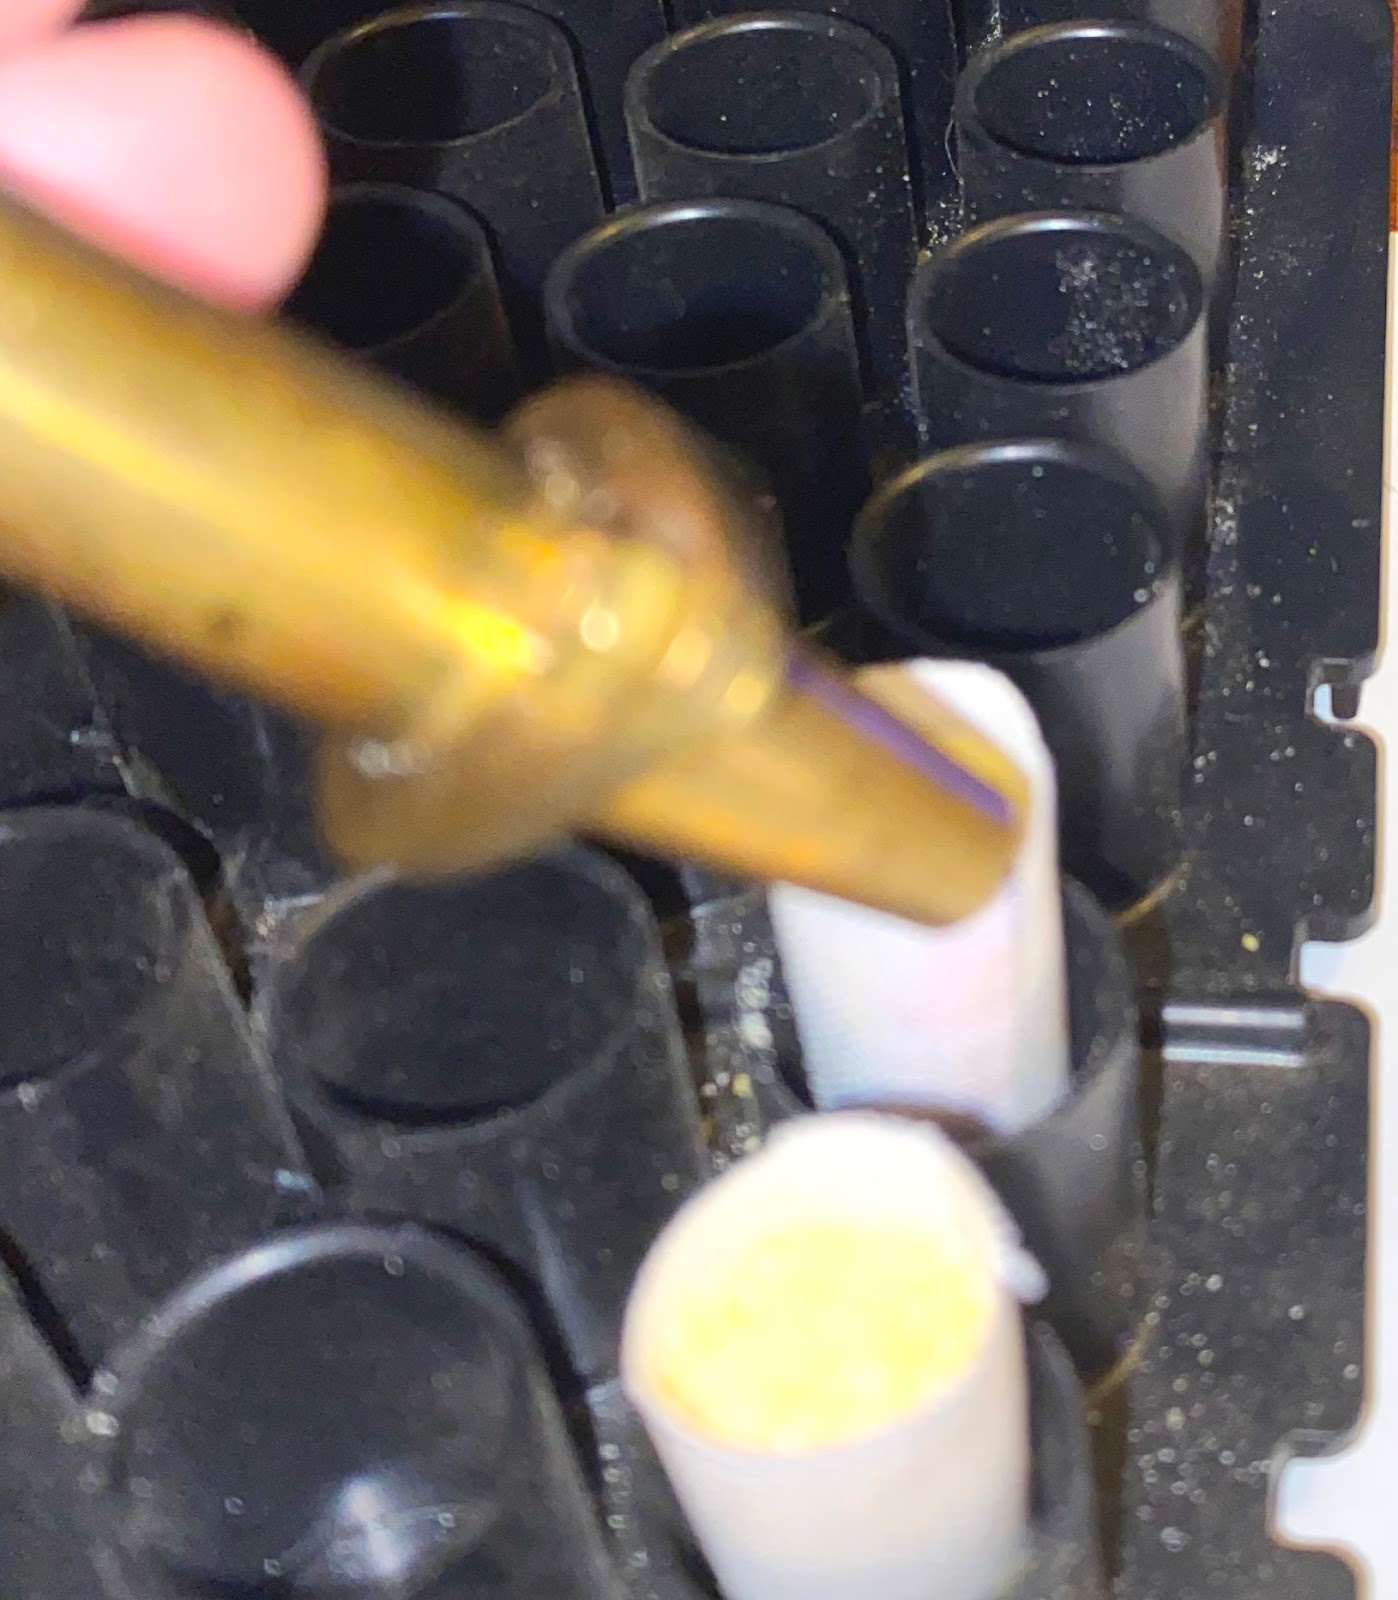
When the bases have dried set the finished shells in a rack.  Measure out the powder charge to be used and pour it into the shells.

Measure the height of the heel of the bullet to be used (the part to be covered by the linen).  Tap the powder in one of the shells to settle it, then measure how close the powder comes to the top of the linen.  Compare this to the height of the bullet heel and this will show how much filler must be used to fill the cartridge completely; measure this amount and add it on top of the powder.  Finding just the right amount of filler might take a little experimentation.  It is best to have the powder and filler take up just slightly more space than the bullet needs so that when the bullet is inserted it will compress the powder slightly.  This not only makes for a firmer cartridge, it also prevents the powder from shifting when the cartridge is laid on its side to be inserted into the chamber of the rifle.

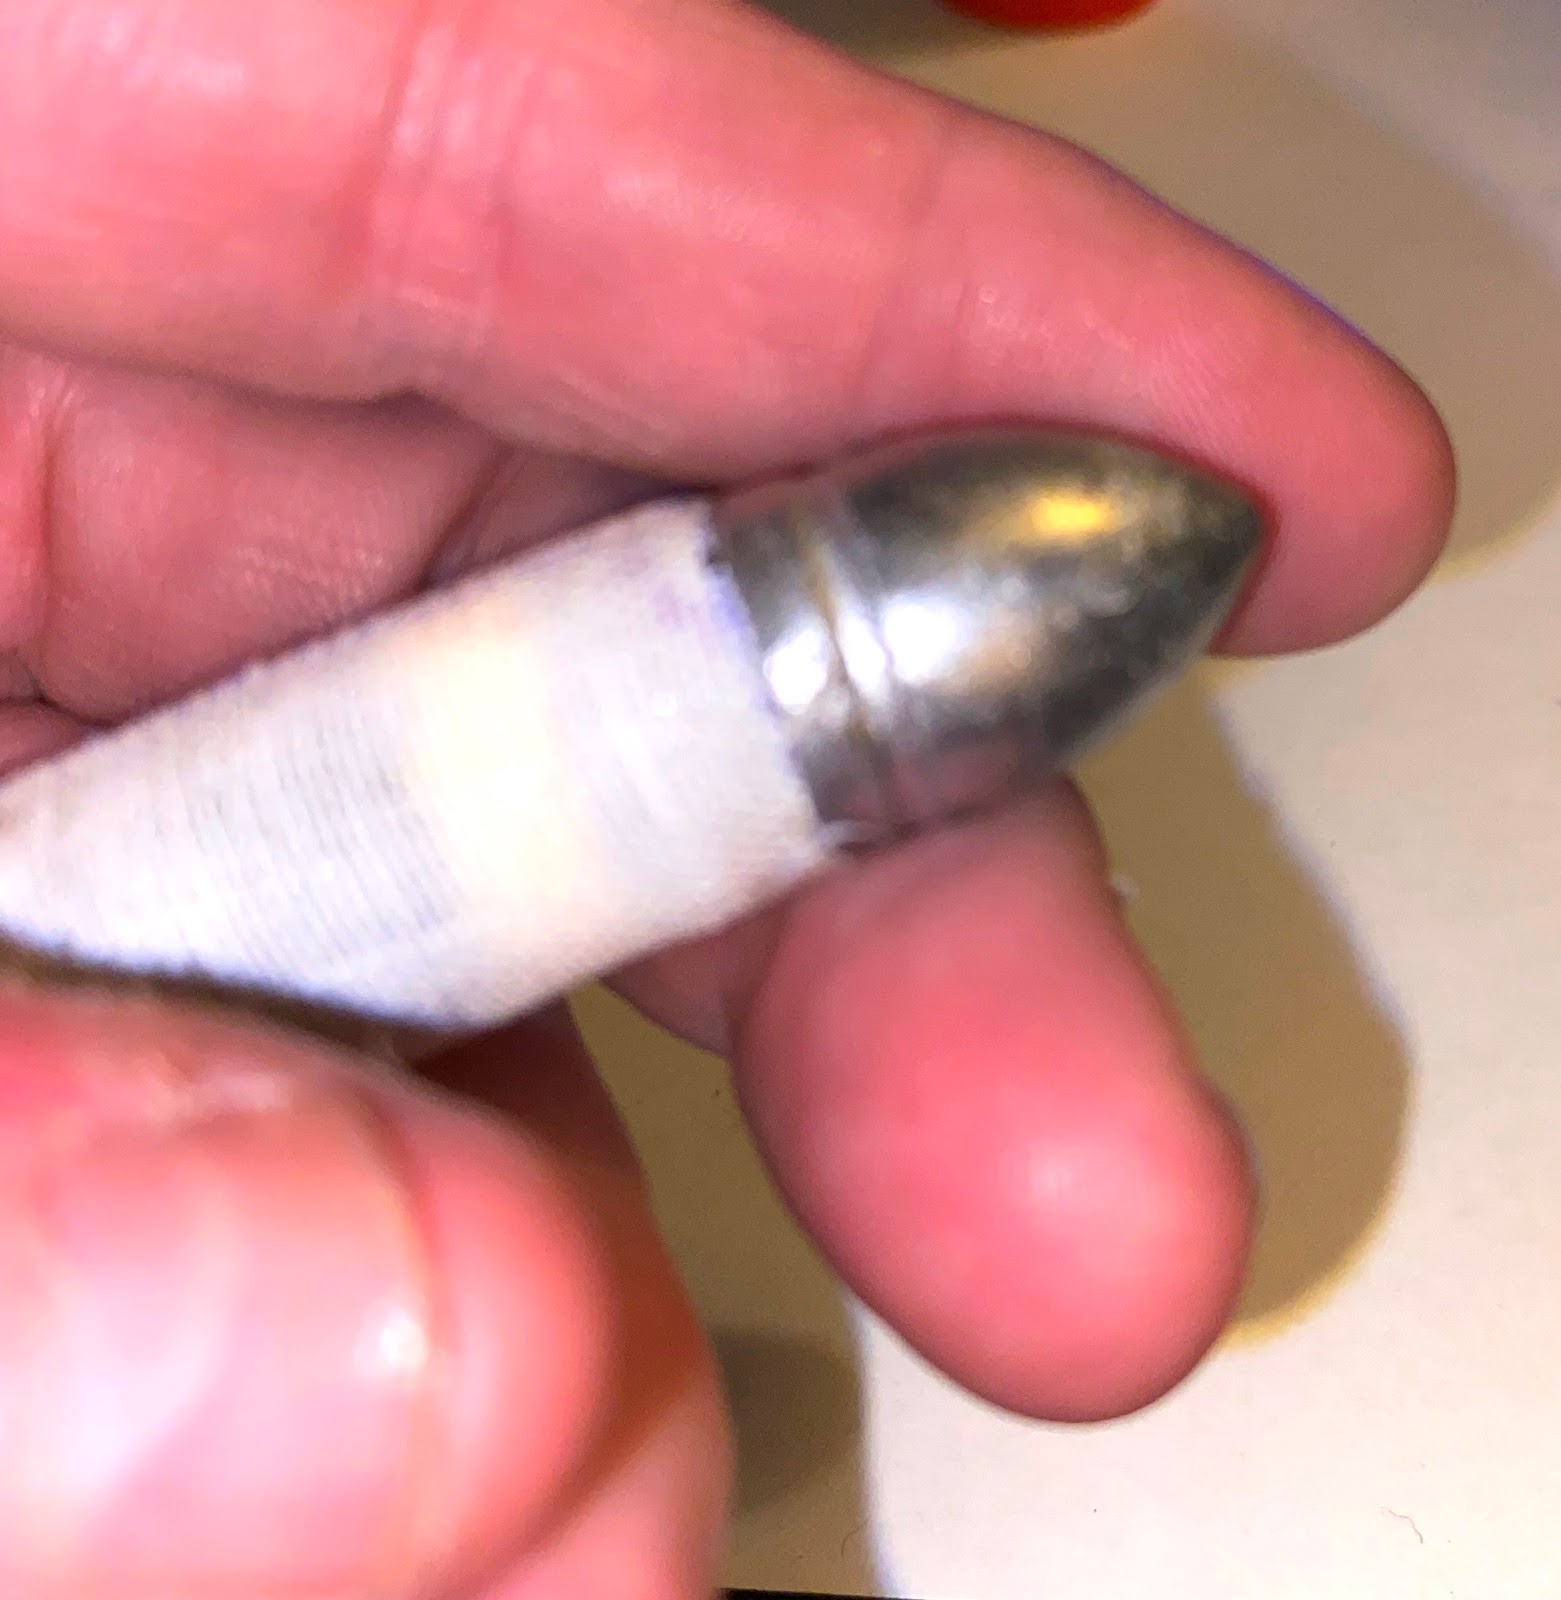
Next, roll the heel of the bullet on a glue stick or paint it with glue, then insert the bullet into the shell.  Squeeze the linen that overlaps the heel to get good adhesion, and hold it in your fingers until the glue starts to set.  This will take longer if a liquid glue is used, and is somewhat faster with glue sticks.  Set the glued cartridges aside to dry.
Pouring the powder charge.
Adding cream of wheat filler.
Seating the bullet.
Ungreased cartridges.

Greasing the Bullets
Grease is an essential element of black-powder cartridges.  It is often called “lubrication” by modern shooters, but it doesn’t actually lubricate.  Instead, it acts to soften the fouling that builds up between shots in order to prevent it from caking the inside of the bore with hard black powder residue.  Each subsequent bullet, then, pushes the softened fouling of the previous shot out of the bore with it, keeping the bore relatively clean while simultaneously leaving new grease behind to soften its own fouling.

The official recipe for bullet grease in the 1861 Ordnance Manual is eight parts of lamb tallow to one part beeswax (Ordnance Department 1861 p. 266), although civilian ammunition manufacturers may have used somewhat different recipes.  Lamb tallow is actually fairly easy to obtain online.  It is best to buy beeswax in pellet form so that it will melts quickly and evenly; if pellets are not available, the wax can be grated first.  Alternatively, if tallow is not available cheap supermarket olive oil can be mixed with beeswax in a 1:1 ratio; this formula is not as effective or as solid, but works fairly well.  Regardless of the formula used, if the weather is especially hot when the cartridges are to be used the percentage of beeswax can be increased to reduce melting from the heat.

Put your mix into a heat-proof microwavable container and microwave it on high until completely liquid or else melt it in a double boiler.  When it is fully melted, dip each bullet into the grease, point first, up to the line of the linen—try not to get any grease onto the linen if it can be avoided.  Set the cartridges on a paper towel or a sheet of aluminum foil to cool.  When the grease has cooled and hardened on the bullets they are complete and ready to package.
Dipping the bullet in grease.
Letting the grease cool.
Finished cartridges.

Cartridge Packs
I make the boxes from a design I worked out.  I print a pattern and glue it to a cardboard backing, cut it out, then glue it together.  I glue a piece of hemp cord to the inside of the back of the box to use to rip the package open.  I print a label I designed to be a close match to one of the original styles (see above) onto brown light craft paper, then cut it to the size necessary to wrap the box.

Wrap a piece of paper around a pen, fold the bottom up and glue it in place.  Then insert 12 musket caps into the tube and twist the top shut to secure it.  Add a row of cartridges to the box with the bullets all aligned with the back of the box.  Lay the tube of caps onto the bullets, then add another row of cartridges on top oriented in the same way.

Lay the wrapper  face down onto the table.  Flip the filled box upside down onto the wrapper so that it is aligned exactly on the label, then wrap the package like a Christmas present and glue it in place.  Make sure the cord extends out from one side of the wrapper.
Tube of musket caps.
Box with one layer of cartridges and a tube of caps.
The second layer of cartridges.
Finished cartridge packets and loose rounds.

Sources
Thomas, Dean S. Round Ball to Rimfire: A History of Civil War Small Arms Ammunition. Part Two, Federal Breechloading Rifles & Carbines. Gettysburg: Thomas Publications, 2002.

———.  American Society of Arms Collectors Bulletin, “Federal Ammunition for Civil War Breechloading Carbines and Rifles.” Vol. 124 (Fall 2021) 78:3-19, americansocietyofarmscollectors.org/wp-content/uploads/2019/06/1998-B78-Federal-Ammunition-for-Civil-War-Breechl.pdf. Accessed 02JAN2022.

United States Ordnance Department. The Ordnance Manual for the use of the Officers of the United States Army. Philadelphia: J. P. Lippincott, 1861.

Range Report 14JUN2026: Comparing the Smith and Burnside Carbines

I spent my Sunday at the Church of the Holy Black Powder.  Among other things, today saw a head-to-head comparison between my Burnside and S...