 |
| My Pietta 1851 Colt Navy with Richmond Lab combustible cartridges in historically correct cartridge packets. |
In this post we will discuss the idea of using a style of
target that more realistically replicates combat shooting in period, and the
effect that type of target can have on shooting results.
Most mid-nineteenth-century military arms were not adjustable for windage in the field, and many were not adjustable for elevation, either, especially revolvers. This meant that soldiers had to “aim off” to allow for distance, environmental factors (e.g., wind and target motion), or inherent inconsistencies in the weapon itself. The quality, design, and/or placement of the sights can have a significant effect on aiming off, with better sights allowing for faster target acquisition and a more consistent sight picture.
Many militaries in this period, including both The US and Britain, taught their soldiers to aim at an enemy soldier’s belt buckle, and then to aim off from there as necessary. Most weapons shot a bit high, especially at closer ranges, so this would generally result in a hit in the body cavity. Modern shooters, however, tend to take targets to the range which are marked with concentric rings to aid in aiming off, and that’s perfectly valid if the shooter is studying historical target shooting. For those interested in military or practical shooting, however, such targets are artificial and misleading—their enemies weren’t marked off that way. For this reason, I make most of my targets with white paper and a three-inch black stick-on disk (I should probably use a two-inch disk as being closer to the size of a belt buckle); there are no concentric rings or aiming aids (NB: I do use a recreation of the Snider qualification target for shooting with my Snider). Of course, this applies to fine adjustments—for grosser adjustments other aiming points might be possible, such as the knee line or shoulder line.
Using this kind of target means that when I have to aim off I have to estimate the approximate shift each time—I can’t just calculate that my target is X yards farther than the point blank, so I have to aim at the next ring out on the target, I have to estimate both the amount of shift in the first place, and then estimate how far that is on the paper with each shot, just as a soldier would have had to do. I have no point of aim, I’m just guesstimating the shift and aiming for a blank spot on the paper that I hope is the correct distance from my Intended Mean Point of Impact.
With weapons which shoot to point of aim this isn’t really a problem: I aim for the black sticker and that’s good enough; for minor adjustments, I can take a 6:00 or 12:00 hold or a right or left edge hold, all of which give me exact aiming points. With a weapon that does not shoot to point of aim, however, I’m stuck guesstimating the sight picture each time I pull the trigger. My Remington New Model Army shoots close to point of aim, so I know that if I take a correct sight picture using a full sight and 6:00 hold I will get String Tests which are consistently under two inches per round at fifteen yards.
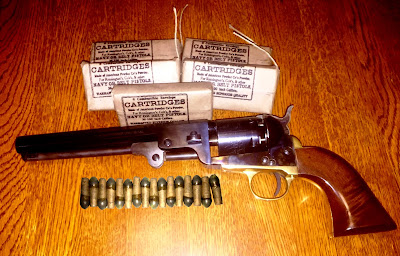
My 1851 Colt Navy, however, shoots quite high—approximately six to eight inches at fifteen yards. Therefore, I have to aim off and put my sights on a blank spot on the target paper, hoping I am both correct in my shift and consistent with previous shots, but that’s extraordinarily difficult to do without an exact point at which to aim. This means my groups tend to be less consistent with the Colt than they are with my Remington, which means the String Test score is much worse. This doesn’t mean the Colt is inherently any less accurate than the Remington, it just means that the results come out that way. As a result, my String Tests with the Colt are in the 4.5-3.5 in./rd. range—far worse than the Remington, and worse than my minimum goal of 3 in./rd.
The extremely poor sights on the Colt are one factor in these results. The tiny front sight is a large part of why the revolver shoots high (just as they tended to in period) and is hard to line up correctly in the small V in the rear sight, and the rear sight being in the hammer means that it isn’t always at exactly the same place in relation to the front sight as it would be with fixed sights.
I usually post all shooting results for the day in these
range reports, but this post is really about the notion of choosing a target
for realistic shooting rather than to show my results. Regardless, here is one target showing Tables
Four and Five. As this shows, I managed
3.7 in./rd. for Table Four and 3.2 in./rd. for Table Five, two of my best
scores for the day, but neither meeting my minimum standard of 3 in./rd. Both Tables of Fire were shot offhand at
fifteen yards using paper cartridges loaded with Richmond Lab bullets over 17
grains of Schuetzen 3F powder and were greased using the 1861 Ordnance
Department recipe.
 |
| Tables Four and Five. |
The two conclusions I want to make here are first, that it takes a lot of practice to learn to aim off when using simple point targets, and second, that anyone seeking to understand historical military or practical shooting (as opposed to Victorian target shooting) should experiment with a simple “point” target like this in order to understand how aiming off really had to be done. Also, of course, stop using the almost meaningless group size as a way of gauging accuracy and switch to using the String Test, both because it is more historically correct but also because it is so much more meaningful (to read about the String Test and learn why it is important and how to do it, read the article HERE).


