Monday, September 28, 2020

Comparing Paper Cartridges to Loose Round Balls

I took my Pietta Remington New Model Army cap and ball revolver to the range to perform a comparison between paper cartridges and loose round balls.

I made the paper cartridges by nitrating unbleached coffee filter paper, then using a Capandball.com former to make them into shells.  I filled them with twenty-five grains of Goex FFFg powder and seated a .44-caliber Kerr bullet on top.  The bullets were then dipped into lubricant made by melting beeswax and lamb tallow in an 8:1 ratio.  The bullets were cast by Christopher Beresovoy at PaperCartridges.com using a mold made by Mark Hubbs at Eras Gone Bullet Molds.

Kerr Paper Cartridges

I weighed four of the finished paper cartridges with the following results (in grains):
242.96
244.88
247.56
247.74
Average: 245.79; Median: 246.22; Standard Deviation: 2.29. 

The round balls were Hornady .454” .44-caliber round balls over thirty grains of Goex FFFg powder and a Wonder-Wad lubricated felt wad.  I recognize that using different loads of powder for the conicals and round balls may seem odd, but during the Nineteenth Century loose round balls were generally loaded onto more powder than was used in military paper cartridges in period, so I chose to follow this practice in order to compare the ammunition as it was actually used.

I shot four groups, two with each, at twenty-five yards from a sitting supported position.  The weapon was a reproduction Remington New Model Army revolver manufactured by Pietta.  The reason there are different numbers of rounds in each evolution is that there were problems with either time or loading, misfires, etc.

I made targets that were designed to simulate those described in Cooke’s Cavalry Tactics from 1862 (pp. 99-100) but reduced in size to match the shorter range.

I evaluated the shooting using the String Measurement Test mentioned by Cooke and described by Heth.  This was a way of evaluating marksmanship from the Civil War (the Berdan Sharpshooters used it) which evaluates both your accuracy (how close you came to your point of aim) and your consistency (your shot group) and expresses them both in a single number.  In more technical terms, it gives a precise figure for the deviation between your Mean Point of Impact and your Intended Mean Point of Impact.  It is like a vastly simpler version of the Figure of Merit technique used by the British army during the same period, and, in my opinion, is far more meaningful than simply measuring the group size as is commonly done today.

In the string measurement test, you hold the end of a string on the bullseye of your target and stretch it to one of the bullet holes.  You pinch the string at that point, move the pinched spot to the bullseye, and stretch the string to another bullet hole.  You pinch the string again at that point, and move that spot back to the bullseye, and continue with this process until you have measured the distance from the bullseye to each hole.  You can then divide the total length of the string by the number of rounds fired to determine an average.

Results:

Table 1:  Kerr paper cartridges.
52.5 in./11 rounds = 4.8 in./round 

Table 2:  Kerr paper cartridges.
41.5 in./9 rounds = 4.6 in./round

Table 3:  Round balls.
55 in./10 rounds = 5.5 in./round

Table 4:  Round balls.
62.5 in./11 rounds = 5.7 in./round

Adding the results, the average overall measurement was 4.7 inches/round for paper cartridges and 5.6 inches/round for loose round balls, a difference of almost twenty percent.  Various Internet sources disagree as to the relative accuracy of conicals and round balls; some argue that when conicals are driven into the chamber this inherently misaligns the bullet and affects accuracy.  These results seem to contradict that idea, although it must be admitted that the sample size is too small to be definitive.  Balanced against this, in a separate test (to be published later) done with a .36-calber Colt Navy comparing paper cartridges made with Richmond Laboratory bullets against round balls (again using historical rather than equal loads), the results were the opposite:  The round balls had the lower average string test measurement.

I do not pretend this is in any way conclusive, but I find the results interesting regardless.  Of course, had I used the same amount of powder for both kinds of bullet that would have been more of a direct comparison, but my intent was to compare the loads used during the Nineteenth Century as they were normally fired.

I offer my sincere thanks to the suppliers mentioned above whose products enabled me to perform this comparison.


Saturday, September 26, 2020

Some Observations Comparing the use of Colt and Remington Cap and Ball Revolvers During the Civil War

The Author's 1860 Colt Army and Remington New Model Army Revolvers.  Both are by Pietta.

There is a great deal of debate on various Internet forums concerning the relative merits of Colt cap and ball revolvers when compared with those by Remington.  Some of it is scholarly and rational, while some seem to be typical mall-ninja “tacti-cool” nonsense.  Little of what I have read, however, focuses on the strict combat utility of the two weapon types, and it is this viewpoint I wish to address.

 For this discussion, we will compare the 1860 Colt Army and the Remington New Model Army since these two revolvers were extremely common during the War and are functionally identical in most respects.  They are loaded in exactly the same way, both are .44 caliber, both can use exactly the same bullet and cartridge loads, and both were deployed and fired in the same way.  Both weapons were considered excellent in their day and were prized by soldiers in the field for power, accuracy, reliability, and ease of use.

There were, however, significant differences between the revolvers.  Some of these differences, such as the thinner trigger of the Colt which was offset to the left in the trigger guard, seem to have little impact on their use, however, there were other differences which had more of a tactical effect.  These significant differences include the sights; the open frame of the Colts versus the closed frame of the Remingtons; the different hammer faces of each and the effect these have on percussion caps; the thick arbor which holds the cylinder on Colt’s revolvers (#15 in Fig. 1) compared to the thinner cylinder pin which holds the cylinder on Remingtons (#6 in Fig. 2); and the different methods for disassembling these revolvers.

Nota Bene:  I have never fired any extant original revolvers of either type, so this analysis is based upon handling modern reproductions.  I believe, based on what others have written and on looking at pictures of extant pieces, that these considerations all hold true for the originals as well, but I am open to correction if that is not the case.

The Sights
Colt revolvers came with a number of different front sight posts during the War, however, the 1860 Army had a small brass blade.  The rear sight was a notch cut into the top of the hammer.  The Remingtons had a tall blade-style front sight, and the rear sight was on the back of the frame rather than on the hammer.

Placing the rear sight on the hammer should mean that it will not always have exactly the same sight-frame reference since the hammer can be in a slightly different place every time it is cocked.  While I have seen people mention this, in practical terms this seems to have little real effect on tactical accuracy (as opposed to target shooting accuracy).

A bigger factor is the fact that the smaller front sight post on Colts causes two problems:  First, it makes it more difficult to get a good sight picture quickly in a combat situation.  Second, Colts are notorious for shooting extremely high.  My experience is that it takes longer to get a good initial sight picture with Colts and to reacquire the sight picture after recoil for subsequent shots, and that while I can hit point of aim with a Remington, I have to aim six inches low or more with Colts at normal ranges, and judging the correct hold difference adds to the length of time it takes to make the shot.  While neither of those factors have much effect on target shooting, they are significant in combat shooting when speed is of the essence.

Balanced against this is the question of how important the sights were in actual combat.  In Instructions in Rifle and Carbine Firing for the United States Army by CPT Stanhope Blunt from 1885, the author says that:

832. Owing to the unsteady support that the hand gives to the weapon the methods of aiming previously prescribed for the rifle and carbine cannot be advantageously followed; this is especially true of the practice mounted, where the motion of the horse and the very limited time available for the delivery of the fire permit neither the steadiness nor deliberation so requisite for success with the other arms.

833. The best results will then be obtained by following the method of snap shooting; for which the pistol should be held raised and then quickly projected at the mark and fired without pause or any effort to align it upon the object, the action being somewhat similar to that employed in throwing a missile from the hand and from the same raised position of the arm. (p. 309.)

Previous sources (e.g., Cooke’s Cavalry Tactics from 1862) do not mention this snap shooting process, but the instructions do not deny it was used, either.  If snap shooting was widely practiced, then these differences in the sights may be of little tactical relevance.

Frame Strength
Every time I see a comparison of these two weapons the stronger frame of the Remington is always mentioned, usually followed by an admission that the person making the point has not seen any real-world deleterious effects caused by the difference.  My experience mirrors that.  I suspect that although the Remington frame is inherently stronger, the thickness of the Colt arbor compensates sufficiently for this difference that the real effect is insignificant, at least with normal loads.

Cap Jams
When firing a percussion revolver, the hammer is driven backward slightly in reaction to the discharge; when this happens, the cap can fall into the mechanism of the revolver, causing it to jam (for a video demonstrating this issue, see: <https://www.youtube.com/watch?v=rCtsdDuv0gs>).

Colt revolvers have a small notch cut into the face of the hammer which is designed to sit on the pins between cylinders so that the weapon can be carried safely.  This notch can grab the cap when it is knocked back and/or when the hammer is pulled back for another shot.  This problem is called “cap sucking,” and while it can be mitigated somewhat by replacing the nipples with better ones, the problem is endemic with Colt revolvers.  Some people also fill the notch in the hammer to reduce the problem, but it can still happen regardless.  It can occasionally happen with Remington revolvers too, but the different design of their hammers, which are flat on the face, makes it much less common.

It is sometimes possible to shake the cap out or to get at it with a small pick of some sort, but the worst cases require the cylinder to be removed in order to clear the malfunction, and it is this situation which marks the biggest differences between Colts and Remingtons.

Colts are open-top designs.  Because of this, the cylinder is held by a heavy arbor, and the barrel assembly is attached to the arbor with a wedge, which must first be removed in order to remove the cylinder.  While I have spoken to people who claim to be able to remove the wedge with their fingers, in the majority of cases the wedge can only be removed by using a non-ferrous hammer to knock it out.  To date, I have not seen a hammer attached to any weapon belt from the Civil War, although a loose rock may perform the same function in extremis

Because of the way Remingtons are constructed, the cylinder is much easier to remove.  You lower the loading lever part way and pull the cylinder pin forward, allowing you to simply push the cylinder out of the frame.  This is fast, extremely easy to do, and requires no tools of any kind.  Popular movies have led people to think that Civil War soldiers used spare cylinders to reload their revolvers, so they see the Remington design as superior because changing cylinders is so easy to do.  In reality, this is a modern idea.  Civil War revolvers were not issued with multiple cylinders, and I know of no evidence for the practice; instead, they just carried multiple revolvers instead of reloading.  However, the cap jam problem points to a different reason for the superiority of the Remington design:  Not only are they inherently less prone to cap jamming, but when it does occur, the fact that the cylinder can be removed so much faster and more easily is a marked advantage when it comes to clearing.  A soldier might not take the time to do so in a swirling melee, but in many situations he could easily do so.

I should add that I have been unable to determine how common the cap jam problem was in the Nineteenth Century.  I have read some say that the cones in original revolvers were superior, which reduced the Colt cap jams, and that may be so.  I will say that when I replaced the Pietta nipples on my Colt with  modern Slix-Shot nipples (<https://www.slixprings.com/index.php>) my cam jams were reduced significantly.  Before the change I came to expect at least one cap jam in every cylinder of fire, and sometimes more, and after the change I once shot fifty rounds consecutively without a single cap jam.

Cylinder Lock
The narrow cylinder pin on Remington revolvers is extremely susceptible to black powder fouling.  After as few as three or four full cylinders have been fired it can cause the cylinder to lock up, making it extremely difficult for it to rotate until it has been removed and cleaned.  The heavy arbor in Colt revolvers is grooved to accept grease, and this prevents this from being a problem.  It is possible to shoot many full cylinders out of a Colt without having this problem occur at all, and many people point to this as evidence of the superiority of Colt revolvers.

Considered tactically, however, this superiority of Colts is illusory.  The process of reloading a cap and ball revolver is so tedious that soldiers were unlikely to do so in the midst of combat unless they had an opportunity to get out from under fire for long enough to make it practical; in actuality, many soldiers carried multiple revolvers for exactly this reason.  If they had enough time to reload, they would also have time in which to wipe down the cylinder pin to prevent cylinder lock, especially given the ease with which the Remington’s cylinder can be removed.  Thus, while this difference can be important to a target shooter, it is not so for a soldier in combat because he would be unlikely to fire enough rounds through his Remington in order for the problem to arise before having time to wipe the cylinder pin clean.

Conclusion
Both the 1860 Army and the New Model Army are superb revolvers, and both were widely issued and prized by the men who used them.  Many of the differences between them are insignificant from a tactical viewpoint, and, to a large extent, preference for one over the other really comes down to personal viewpoint.  Despite that, however, I think it really is possible to say that the Remington is objectively and significantly superior from a tactical viewpoint.  Even if we allow, arguendo, that the poorer sights on the Colt can be ignored because good training and experience (especially if snap shooting was practiced) can minimize the problem, the problem with cylinder removal to reduce a stoppage remains and seems significant.  A soldier with a Remington can duck behind cover and remove his cylinder quickly and easily so as to make his weapon functional again, whereas the process is much more difficult for a solider armed with a Colt, and usually requires him to have easy access to a hammer.

Update:  Historical Cap Jams
For a comparison of an actual extant Remington NMA and a Colt Army, see this excellent video by Balázs Németh of Capandball.com:  https://www.youtube.com/watch?v=5AThglFR5N4.  Note that the Colt experiences several cap jams during his test, however, it's possible that the cones were replaced with new ones since the extant cones are often unusable in extant revolvers.  I don't know if Mr. Németh did so in this case, but it should be considered if we're trying to understand how common cap jams were in period.

This video discusses cap jams in the historical record:  https://www.youtube.com/watch?v=ASbDnicII9o.

Pistol Marksmanship in the Civil War

 In the hands of the Southern cavalry the revolver became their pet and pride. The terrible use to which it was put in broken ground, at close quarters, by Moseby’s troopers doubled its real efficiency by its moral strength.  (Whittaker, Volunteer Cavalry, p. 14.)

Shooting Technique

Cooke’s Cavalry Tactics and Whittaker’s Volunteer Cavalry give moderately detailed instructions regarding pistol shooting technique.  Cooke gives detailed instructions for the manual of arms (pp. 56-57) in which the trooper is taught to draw his revolver, hold it upright by the right shoulder with the trigger finger outside of the trigger guard, a position called “Raise Pistol,” and then to let it down into the left hand while the right thumb cocks that hammer.  He also says that “To cock the pistol rapidly without the use of the left hand, place the thumb upon and press down the hammer, throwing forward the muzzle with a rapid motion, to assist the action of the thumb.”  Whittaker does not even discuss holding the piece with the left hand to cock it, indicating that it should always be cocked one handed (p. 118).

Returning to Cooke, he says that after cocking the trooper should return to the Raise Pistol position, then, upon the command to fire, “lower the pistol to the front, the arm about three-fourths extended, the forefinger upon the trigger; aim with the right eye, the left eye closed.”  The weapon is then returned to the Raise Pistol position before each subsequent shot.  He does not say why to do this, however, modern practice has shown that doing so will reduce cap jams, the bane of the cap and ball revolver.  Whittaker’s drill (pp. 118-119) is virtually identical to Cooke’s, apart from cocking, except that he says the shooting arm should be extended until almost straight, which seems to indicate stretching the arm out more than Cooke recommends.

Marksmanship Practice

Unfortunately, there is little extant information from the period about military standards for pistol marksmanship.  No infantry manual I have found even mentions the subject, however, most cavalry manuals describe at least the manual of arms if no more.  Cooke includes a brief discussion of a program of target practice (pp. 98-100).  In his instructions, troopers were to shoot at a target eight feet high and three feet wide; a three-inch black band was painted across the target at a height of six feet, and a white square was painted in the center of the band to create an aiming point three inches square.  Troopers were to ride past this target at various ranges, starting at ten paces (for recruits) and working up to one hundred, and at various gaits from a walk through to a gallop.  No time limits are mentioned for the evolution, nor does he provide any minimum standards of accuracy, however, in Congdon’s Cavalry Compendium we are told that “A good shot with Colt's revolver can hit the size of a man's head at fifty yards” (p. 35); personally, I find that estimation to be somewhat optimistic, at least with regards to an average trooper, especially when mounted, and we can hardly take it as the expected standard of marksmanship.

Cooke includes instructions (p. 99) requiring each unit to participate in target practice every three months and to record the results for each trooper on a form, an exemplar of which is included (p. 100).  The form mentions both mounted and dismounted shooting, but the instructions only describe the mounted process.  Since the records form requires officers to record each trooper’s score at fifty and one-hundred paces, both for mounted and dismounted practice, this strongly suggests that the exercise was for the carbine, not the pistol, as those ranges exceed normal pistol effective range.  Still, we can borrow this process with some minor adaptations for our purposes since no other source discusses a process for target practice on foot with cap and ball revolvers.  Whittaker gives a somewhat more detailed evolution for practice (p. 120), but, again, it focuses entirely on mounted shooting.

According to Cooke’s instructions, each trooper (“not in capital punishment,” as he put it) was expected to engage in formal target practice each quarter, firing at least twelve rounds each, with the top shooters receiving unit distinctions.  Forty-eight rounds per year seems extremely limited compared with modern standards of training, but given that infantry units had no official practice at all (except for the sharpshooter regiments) this was still valuable, and there may well have been more informal practice.

For the purposes of modern practice a white sheet of paper cut to approximately twenty-four by forty-five inches was affixed to a target stand.  Two two-inch-wide strips of tape were laid across the paper about one-third of the way from the top edge, and the ends of the strips were separated by a gap of approximately two inches in the middle of the paper to create an aiming point approximately two inches square.  This is a smaller target than that specified by Cooke because of the shorter range to be used for the practice.

The “string” used for measuring accuracy (see below) was a cloth measuring tape to make the measurement easier to do.  The shooting was done one-handed in the manner prescribed by both Cooke and Whittaker.


String Test Measurement

According to the form Cooke published for quarterly qualifications, accuracy was determined by the “string test” measurement system also used for rifle practice by the Army’s Berdan sharpshooters.  Cooke did not explain the procedure for the string test measurement, but fortunately Heth did so in detail (p.61).

In Heth’s method, the end of a string was held at the center of the target and then the string was pulled to one of the bullet holes.  Pinching the string at the point where it reached the hole, that part of the string would be moved back to the center, and from that point the string would be stretched to another hole, pinching the string again at that point.  This would be repeated until the distance from the center was measured to each of the hits.  The total length of string would then be measured to determine the final score.  Alternatively, the string could be cut to a predetermined length so that it was instantly possible to identify non-qualifying scores without the bother of measuring; if you ran out of string before measuring each of the hits, that indicated a disqualification.   A demonstration of the string test measurement can be seen in this video: https://www.youtube.com/watch?v=nc86bNcD2hM.

According to Cooke’s instructions, any miss when dismounted counted as twenty-four inches, and any miss when mounted counted as thirty-six inches; conversely, Heth set a miss as equal to twenty inches with a rifle.  For this practice misses were to be counted as ten inches because of the shorter range.

The string test measurement gives a precise measurement of the difference between the Mean Point of Impact and the Intended Mean Point of Impact, and is thus an excellent way to track both shot grouping and zero in a single measurement using a historically accurate process.

The British army of the Victorian era used a different procedure called the “figure of merit” system to determine accuracy, a similar but far more complicated procedure which tracks the X and Y axis location of each hit then graphs them for analysis.  Comparing the string test measurement to the figure of merit system, the latter seems much more complex and laborious and is only capable of judging grouping, not grouping relative to aiming point, as the string test measurement does (although Rob Enfield expands the system to address that in the video shown here: https://youtu.be/zAntq2M0o30).

After each firing table conducted for this project the total number of shots was recorded along with the string test measure for that phase.  Although not shown on the form in Cooke, the number of shots can be divided into the total number of inches to arrive at a score for that table.  For the purposes of experimental tracking, the date, temperature, weather conditions, and load information were also recorded in a Range Log.

Sample Record:

5/24/20 Dry, 75 deg., light wind from 3:00.
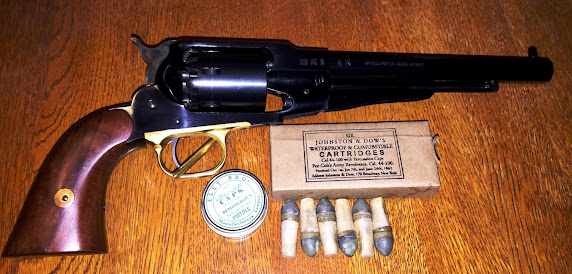
Arm:  Remington New Model Army.
Load: .44 Kerr bullet, paper cartridges, 25 grs. 3F Goex.
Firing Position:  Sitting Supported @10 yards.
Rounds: 12, String: 31.25” = 2.6”/rd. 

Cooke’s form does not include this level of detail, however, both Heth and Blunt describe the importance of environmental factors in detail, and Blunt provides a sample form for recording practice results (p. 328) with places to record all of it.  This information is valuable and serves both to provide experimental information about various bullet weights and loads and to track improvements in the shooter’s marksmanship over time.

It is truly unfortunate no record exists of the evolutions used to conduct target practice on foot during the period.  Both Cooke and Whittaker made it plain that pistols were often used on foot for skirmishing, so it seems possible some kind of walking or running target practice—akin to that describe for mounted practice—would have been valuable, but if such practice was conducted no records of it survive.

Sources:

Blunt, Stanhope E.  Instructions in Rifle and Carbine Firing for the United States Army.  New York: Chas. Scribner & Sons, 1885.

Cooke, Philip St. George. Cavalry Tactics, or Regulations for the Instruction, Formations, and Movements of the Cavalry of the Army and Volunteers of the United States. Vol. I. Washington: Government Printing Office, 1861.

Congdon, James A. Congdon's Cavalry Compendium: Containing Instructions for Non-Commissioned Officers and Privates in the Cavalry Service.  Philadelphia: J. P. Lippincott & Co., 1864.

Heth, Henry.  A System of Target Practice for the Use of Troops When Armed with the Musket, Rifle-musket, Rifle, or Carbine.  New York: D.’ Van Nostrand, 1862.

Whittaker, Frederick. Voluntary Cavalryman: The Lessons of the Decade by a Volunteer Cavalryman.  New York: private printing, 1871.

Thursday, September 24, 2020

Principles of Civil War Marksmanship

Ideally, a historical shooter should examine sources from his region and period of interest in order to determine how marksmanship was practiced with the weapon he is using.  Unfortunately, although marksmanship was studied extensively in England during the Nineteenth Century, little information about the practice of marksmanship in America during the Civil War period exists.  None of the extant infantry manuals from the War discuss the subject at all, and some sources suggest that many soldiers of the time had never fired their weapons before doing so in battle for the first time.  Some of the cavalry manuals did discuss some aspects of the art (e.g., Cooke’s Cavalry Tactics from 1864), but even they were very vague and general.  Fortunately, at least one detailed study of marksmanship exists from the period, viz., Heth’s A System of Target Practice from 1862.  In addition, some manuals from immediately after the War covered the subject (e.g., Whittaker’s Volunteer Cavalry: The Lessons of the Decade from 1871 and Blunt’s Instructions in Rifle and Carbine Firing for the United States Army from 1885) and can be assumed to reflect the principles in use during that time.

In order to shoot well, you must understand what the bullet does.  With our modern firearms we expect nearly flat trajectories, but black-powder weapons had much more extreme parabolas.  This means it was necessary to understand the bullet’s path and to judge the distance well in order to make a good hit.

The line of fire is a straight line extending through the centre of the barrel, indefinitely produced. The line of sight is a straight line passing through the middle of the notch of the rear-sight and the top of the front-sight. A ball describes a curved line in its flight, which line is called the trajectory. When fired from a gun, the ball crosses above the line of sight after going a certain distance,--according to the arm used,--it crosses below the line of sight: this point is called the point-blank. Suppose the point-blank of your carbine to be one hundred yards: to hit an object at that distance, aim at it; if the object is closer, aim below it; if farther off, aim above it. Good aiming can only be attained by proper instruction and careful practice.  Congdon’s Cavalry Compendium pp. 34-35.

Figure 1

Every weapon, and every load used with that weapon, will have a different trajectory, and it is important to understand that trajectory in order to learn to use the weapon well.

Here are some important terms that will be used on this blog:

Point of Aim (PoA):  The point at which you aim your sights.

Mean Point of Impact (MPI):  The average of the group where your shots actually hit; group center.

Intended Mean Point of Impact (IMPI):  Where you intended your group to center.  Also called “Correct Zero Point.”

Grouping:  Adjusting your ammunition, sights, sight picture, and point of aim so that your group size is as small as possible.

Zeroing:  Adjusting your ammunition, sights, sight picture, and point of aim so that your MPI moves to your IMPI.

Line of Sight (LoS):  An imaginary line connecting your eye, your rear sight, your front sight, and the PoA.

Bullet Trajectory:  The actual path of the bullet’s travel.

Line of Fire (LoF):  An imaginary line from the center of the bore to infinity.

Point Blank Range (PBR):  The second of the two points at which the trajectory crosses the LoS.

Aiming

Sight picture refers to the shooter’s view of the rear sight, front sight, and target in line when aiming for a shot.  The front sight should be centered in the notch of the rear sight with the point of your front sight on your PoA.  Sight picture can affect your MPI significantly, and there were three sight pictures used for shooting in the Nineteenth Century, Full, Half, and Fine, as described below.

In addition to sight picture, your hold point on the target is important.  The hold points listed below refer to the PoA you use on a target, and are what Cogdon was talking about in the quote above when he said to aim on, above, or below your target.

Each of the sight pictures can be combined with a hold point, so that, for example, you can shoot with a Fine Sight picture at a 6:00 Hold, or a Half Sight picture at a center mass hold.  Combining these gives a shooter the ability to significantly affect the impact of his shots without adjusting his sights.

Interestingly, modern shooting principles call for shooters to prefer the full sight picture, however, every marksmanship manual of the period calls for the half sight as the standard for normal use.

 Sight Picture

·        Full Sight:  The top of the front sight is aligned with the top of the rear sight.  This is the highest MPI and should be used when you are shooting under the target.

·       Half Sight:  The top of the front sight is halfway between the top and the bottom of the rear sight notch.  This is a medium MPI and is hard to do consistently.

·       Fine Sight:  The top of the front sight is barely above the bottom of the rear sight notch.  This is the lowest MPI.  Use this when your bullets are passing over the target.


Figure 2


Hold Points:

·         6:00 Hold:  At the bottom of the bullseye (image 1 in Figure 3).

·         Center Mass Hold:  In the center of the bull (image 2 in Figure 3).

·         12:00 Hold:  At the top of the bullseye (image 3 in Figure 3).


Figure 3


The following Four Rules of Rifle Marksmanship come from The Boy's Manual of Seamanship and Gunnery by Charles Burney from 1871.

Four Rules of Rifle Marksmanship

1.      To see that the sights do not incline to the right or left.

2.      That the line of sight should be taken along the center of the notch of the back sight and the top of the fore sight, which should cover the middle of the mark aimed at.

3.      That the eye should be fixed steadfastly on the mark to be aimed at, and not on the barrel or fore-sight, which latter will be easily brought into the alignment if the eye be fixed as directed.

4.      That in aiming the left eye should be closed.

 This list is extremely interesting in that point #3 differs from modern practice.  The modern practice is to bring the front sight into focus while allowing the target and the rear sight to be blurred in your vision, whereas in every period source we are instructed to focus on the target and not on the sights.

Monday, September 21, 2020

Introduction to Historical Shooting


At its simplest level, historical shooting refers to shooting historical firearms (either antiques or modern replicas) with as much historical verisimilitude as possible using period-correct ammunition, equipment, and shooting techniques in order to understand how they worked.

 Historical shooting falls somewhere between modern target shooting and full-blown living history. In living history, one attempts to portray a person from another period as accurately as possible, both to teach others how that person lived and so that the reenactor himself can learn about it through what is sometimes called “experimental archeology,” and does so across a broad spectrum of life, from clothing to food to entertainment to crafts and more.  Modern target shooting is focused entirely upon getting the best accuracy possible from a given weapon or ammunition with no regard for history if more modern weapons, techniques, or equipment will produce a better result.

Historical shooting focuses exclusively on a single aspect of living history—the use of arms—and is less focused on an accurate portrayal of life in period and more on the functional use of those weapons.  Likewise, while a historical shooter should be concerned with accurate shooting, he is entirely focused upon using historically correct weapons, ammunition, equipment, and techniques, and should never allow modern elements of the sport to influence his shooting.  Thus, a historical shooter can justly ignore whether a given piece of his kit is exactly correct for his impression except as it relates to the use of his weapons so long as it has no significant effect on his shooting.  For example, if one is shooting a Civil War rifle, he might think it important to carry a canteen of that period in order to understand how doing so interferes with his ability to shoot well, but might not be terribly concerned about whether or not that canteen is of the exact style for any given year or unit of the War as long as it is functionally similar.  Likewise, the historical shooter should not use a modern bullet type or powder formulation in the hopes of improving the accuracy of his fire.

Historical shooting revolves around three things.  First, good quality, functional firearms which are either original or else accurate reproductions of the originals; second, shooting equipment, and possibly clothing, which functions in much the same way as the originals did, especially with regard to encumbrance and restriction of movement; and third, the careful and attentive reliance upon the shooting manuals, either civilian or military, of the period.

The inspiration for this blog was the work by Rob “Enfield” (apparently a nom de plume) of the British Muzzleloaders YouTube channel (https://www.youtube.com/user/britishmuzzleloaders/featured), which explores historical shooting with British and Empire weapons of the Victorian era.  The videos include, among other things, analyses of the way in which British load-bearing equipment, period-correct ammunition, firing positions, and target practices from authentic military manuals affected accuracy and rate of fire and how the weapons themselves impacted history.

As a newcomer to black powder firearms and as someone who has been active in highly authentic living history (albeit of a different period) for many years, Mr. Enfield’s channel had a significant impact on me:  I realized I did not just want to learn to use historical weapons, I wanted to learn how they were used in period and why they were used that way.  This blog will include essays relating to the historical use of military weapons from the American Civil War and Victorian England, including pistols, carbines, rifled muskets, and rifles.  It will focus on the weapons themselves, the ammunition, the equipment used with them, and on historical methods of shooting.
 

Range Report 04May2024: Comparing Colt and Remington New Model Army Revolvers

  Today's shooting conditions. Today’s range session was supposed to be dedicated to doing some ballistic testing of a handful of recrea...