Friday, April 29, 2022

Ballistics of the Smith Carbine


This trajectory graph was created in Excel using information derived from this web page: <shooterscalculator.com/ballistic-trajectory-chart.php> along with information I gathered (e.g., bullet weight, diameter, and muzzle velocity) as listed in the following chart:


This trajectory is meant to echo those shown in British musketry manuals (see below) of the period to show the “danger zone” of a particular weapon.  The danger zone is the area from “first catch” to “first graze” at any particular sight setting.  First catch is the range at which a bullet fired at that given sight setting will hit a standing man at the top of his head, and first graze is the range at which that same bullet would hit a man on his foot.  Thus, the danger zone is the range over which a given bullet would hit an enemy somewhere from the top of his head to his foot when you aim at center mass.  At normal rifle ranges, the trajectory will pass over an average soldier’s head for quite some distance, so knowing the danger zone is quite important.  With black-powder rifles danger zones start very wide, but at very long ranges the zone shrinks dramatically because of the parabolic nature of the bullet trajectories.


Note that the trajectory chart starts at 56 inches off the ground because that is the height of an average man’s shoulder.

Working from the assumption that the maximum effective range of the Smith Carbine is 150 yards, we can see from the above that the danger zone is the entire distance at which the weapon can be fired since first graze is at approximately 195 yards.  Thus, using this load and this bullet, if you aim at center mass you will it an enemy somewhere on his body at any normal shooting range for the weapon.

Note, however, that this information is based upon the load I use (i.e., 35 grains of 3F Schuetzen black powder with a 360-grain Eras Gone bullet) fired from my reproduction Pietta carbine.  For detailed information about how I load cartridges for my Smith carbine, go here.  Given that the original Smith load was closer to 50 grains and that nineteenth-century power was, in general, of much higher quality than we get today, and given that I cannot compare the rifling of the Pietta with an original, it is almost certain that these results do not match what an original would have.  Regardless, this information is useful for me as a way of estimating how to aim off for distance with my carbine.  For example, looking at the graph I can see that the highest point of the trajectory is 59.27 inches from 40 to 50 yards, whereas it is 54.04 inches at 100 yards, so I can see that I must aim about six inches lower when shooting at that distance than I would if I were shooting at 100 yards, and that matches well to my empirical experience.


Monday, March 28, 2022

The Shooting Kit of a Snider Rifleman

INTRODUCTION
The equipment needed or desired by a historical shooter is largely a matter of personal taste and interest; the kit chosen can be as simple as just a weapon and ammunition or can be as elaborate as a full military uniform and equipment as for a living history presentation, or anywhere in between.  In this post I will review the gear I have assembled for my personal kit as an example of what the reader may wish to consider.  Obviously, this is a work in progress and will need a lot of work to bring to the standard I hope to achieve.

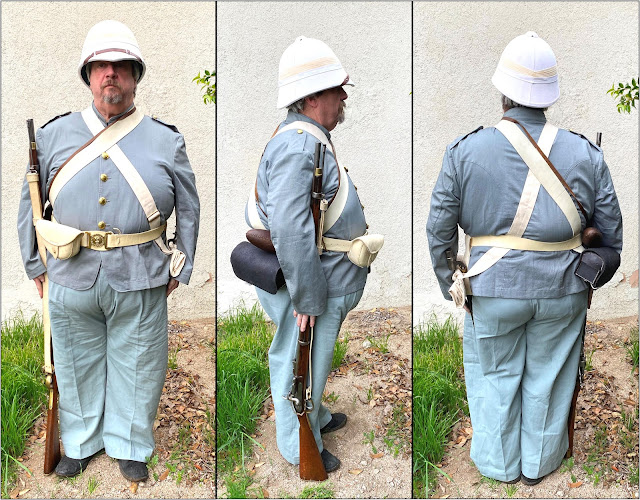
While I do not intend to participate in a nineteenth-century living history group, I elected to pick a specific campaign in which the Snider played an important role as a way to focus my choices in a consistent way. I chose the Abyssinian campaign of 1866-1868, and specifically the Battle of Magdala, because that was the first time the Snider played an important role in the warfare of the period. For even more precision, I chose the 4th King’s Own Royal Regiment as my unit since they were one of the first in contact. For others of a like mind I heartily recommend reading Stanley’s Magdala:  The Story of the Abyssinian Campaign of 1866-7. For an excellent exemplar of a soldier from that campaign, look at the picture of a private of the 4th Foot shown below which was taken during the Abyssinian campaign.  As the photographs of the period make plain, by this point in history soldiers rarely wore knapsacks in battle, they being carried in the unit pack train instead. For that reason I chose to forego the knapsack and assemble the rest of the kit appropriate for a soldier in that battle; we might term this kit “Field Order.”

A Private of the 4th Foot in Abyssinia.

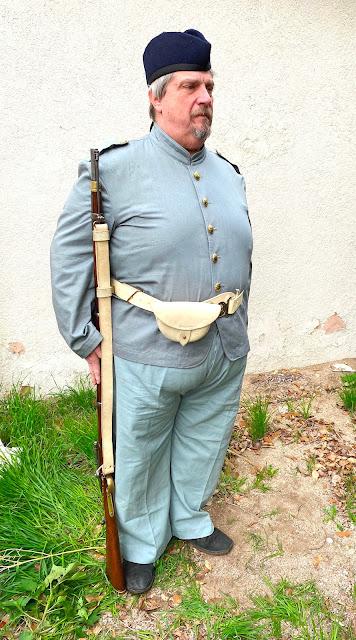
My full Abyssinian Campaign uniform.
Drill Order uniform.

E
QUIPMENT DESCRIPTION
The air-tube helmet shown in the picture of a soldier of the 4th Foot came about because British designers were seeking a way to make a helmet suited to the heat of their foreign conquests. Harry Elwood of Elwood and Sons came up with a so-called ‘air chamber principle’ for hats. I have recently acquired a reproduction air-tube helmet made by a friend, but the example in the older pictures above is a modern reproduction of a later foreign-service helmet.
The Elwood air-tube helmet.

My reproduction air-tube helmet.

Information about the uniform worn in the Abyssinian campaign is somewhat limited, however, this was the first instance of khaki (or “kharki”)—a gray, tan, or brown fabric made of closely twilled linen or cotton—being officially issued to British troops (Farwell 1989 p. 75). This was the standard white drill uniform of 1859 dyed khaki in color (Barthorp 1988 p. 45); the jacket has a standing collar and five buttons, and the trousers are supported by braces. The uniform had a loose, comfortable fit well suited to hot weather.  Although people today usually think of khaki being a brownish color, the color of such uniforms varied widely, and it is likely those worn by the 4th Foot were a sort of bluish gray (Barthorp 1994 p. 20).  Unfortunately, no one carries the blue-gray khaki of the period, so I ordered a replica uniform from Regimental Quartermasters (regimental-quartermaster.com/index.html).  The shirt pictured below comes from The Replicators in India.

Standard British military shirt.
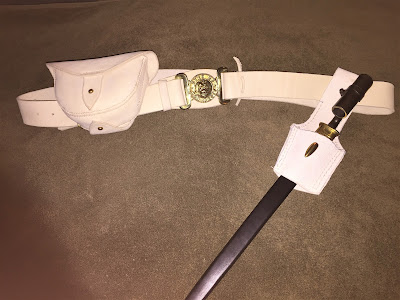
The load-bearing equipment of this period as worn in combat consisted of the 1862-pattern waist belt, 1861-pattern ball bag, 1854-pattern bayonet frog, and the 1859-pattern cartridge pouch as modified for the Snider and suspended from a buff sling. As noted above, and as the pictures of the Abyssinian campaign make plain, the knapsack was not worn in combat at this time, so I do not use one. The pattern 1862 waist belt had a thong for attaching the locket (buckle) rather than having it sewn on as in previous models (Turner 2006 p.49) and was worn over the sling of the cartridge pouch to keep it from moving in use. My waist belt and ball bag were made by Graham Humphrey. The locket or buckle for this pattern of waist belt should be of the regimental design, however mine is a later “Dieu et Mon Droit” Edwardian example, an anachronism I am willing to accept; it comes from Regimental Quartermasters.

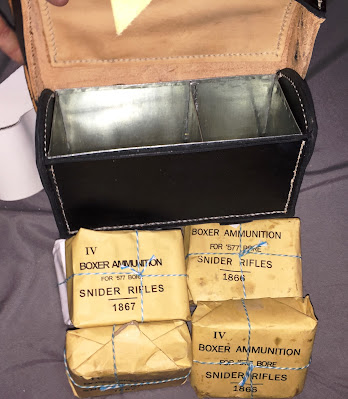
The ball bag was used to carry a rag, the oil bottle, and ten rounds of loose ammunition (id. p. 49). The cartridge pouch was modified from the previous model by removing the cap pouch and by modifying it to hold 50 rounds of wrapped Snider ammunition in two tin dividers along with a compartment for the Snider combination tool (id. p. 63). My load bearing equipment comes from Graham Humphrey.

My waist belt, ball bag, and bayonet.

Interior of the ball bag showing ten loose rounds, an oil bottle, and a rag.

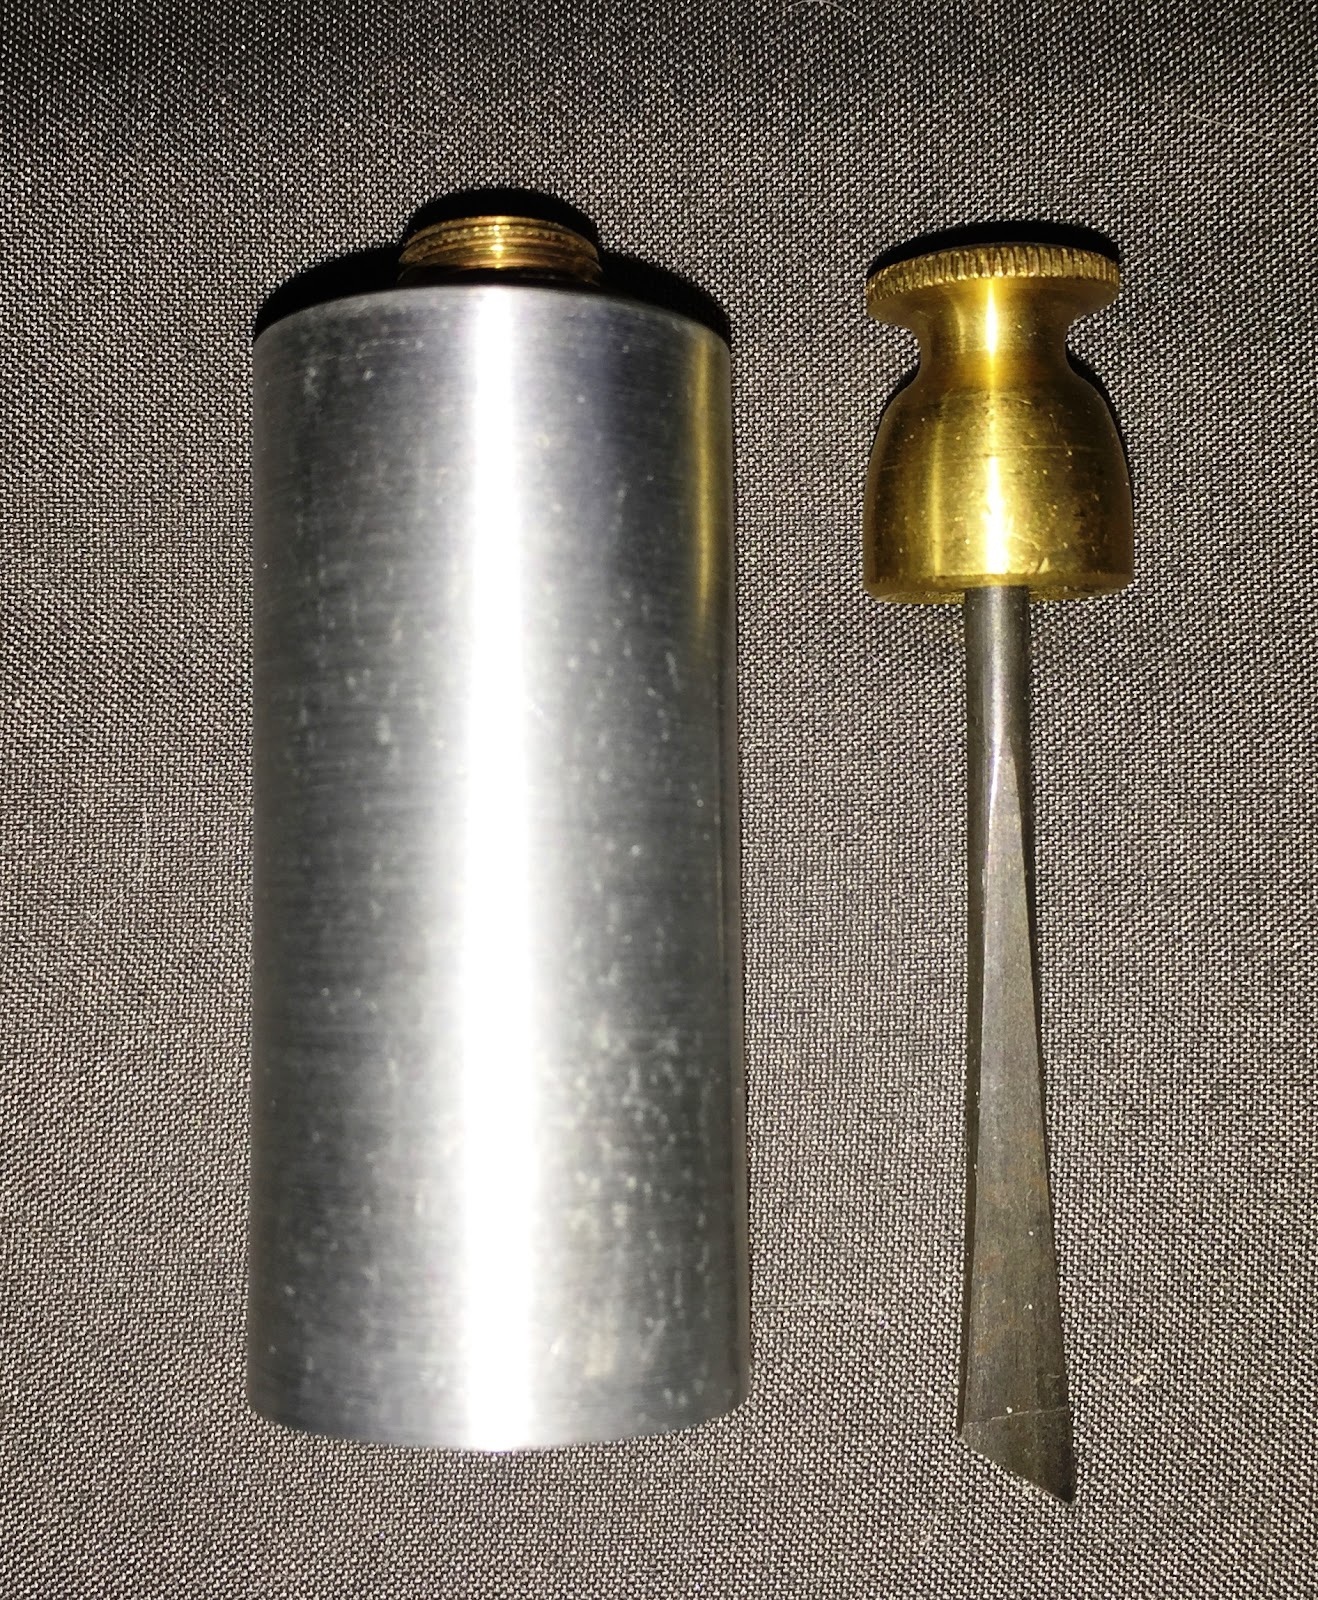
The oil bottle.

My cartridge box with 50 rounds of wrapped ammunition.
Fifty rounds in the cartridge box.
The implement compartment under the lid of the cartridge box.
The cartridge box, closed.

The standard issue canteen for British troops at this time was the 1862 pattern, however, these weren’t issued in India, which is where the 4th Foot was before being shipped to Abyssinia.  There, troops received locally sourced soda water bottles with leather covers and slings (Barthorp 1994 p. 17), and it is these water bottles which were probably carried by the 4th in this campaign. Mine comes from Regimental Quartermasters.
My Indian Mutiny-style water bottle.

The pattern-1867 haversack was made of linen or cotton and was changed from the previous versions by adding a sliding buckle to make the shoulder strap adjustable.  In addition, this pattern had a button on the back so that when not in use the bag could be rolled up and buttoned (Turner 2006 p. 25). Although the haversack was normally used for the food ration, I use mine for shooting supplies such as a cleaning kit, target markers, notebook and pen, etc. My haversack comes from Regimental Quartermasters.

My haversack, shown open.

My haversack buttoned up for carry when empty.

My Snider is a Mk. III model made in Nepal in 1868, and thus it is impossible that it should have seen service in Abyssinia. Rather, the rifles used at Magdala were almost certainly Mk. II’s, although, again, I am perfectly content with this anachronism.  I purchased my rifle from a private collector.  Since Sniders were converted from the earlier 1853-pattern Enfield rifle (and even the new-built Mk. IIIs were of precisely the same design at the muzzle), the 1853-pattern bayonet and scabbards were still in use. My bayonet is from 1864 and was used during the American Civil War, but the scabbard is a modern reproduction. They were purchased from a private collector.  The rifle sling used in the Abyssinian campaign was probably the 1850 pattern with a buckle on the rear, however my sling is the 1871 pattern which was the last buff-colored version and was attached with a leather thong rather than a buckle (id. p. 44), which was the type used on later Sniders such as mine. My sling comes from Pierre Leather.  The ammunition carried was made with a mold sold by X-Ring Services using brass from the same company.

My Mk. III Snider-Enfield Rifle.

My Enfield bayonet.

Finished Snider cartridges.

Nota bene:  Of course, if I were an actual Snider "rifleman," I'd have a two-band Snider and my leather gear would be black.  I hope my readers will appreciate the linguistic nuances of my word choice for the title of this essay.

WORKS CITED
Barthorp, M. and D. Anderson. The British Troops in the Indian Mutiny 1857-59. London: Osprey Publishing, 1994.

Barthorp, M. and P. Turner. The British Army on Campaign 1816-1902 (3): 1856-1881. London: Osprey Publishing, 1988.

Farwell, Byron. Armies of the Raj: From the Mutiny to Independence, 1858-1947. New York: W. W. Norton, 1989.

Stanley, Henry M. Magdala: The Story of the Abyssinian Campaign of 1866-7. London: Sampson, Low, Marston & Company, 1896.

Turner, Pierre. Soldiers’ Accoutrements of the British Army 1750-1900. Wiltshire: The Crowood Press, 2006.

SUPPLIERS

Stan Dolan, Regimental Quartermasters <www.regimental-quartermaster.com/>

Graham Humphrey, Graham the Leather Guy <grahamtheleatherguy@gmail.com>

Martyn Robinson, X-Ring Services <xringservices@yahoo.com>

Le Pierre Sutler <www.lepierreleathers.com/>

Monday, March 21, 2022

Range Report: 20MAR2022--Remington New Model Army and Smith Carbine


Definitely not my best day of shooting, but, as they say, a bad day shooting is still better than most days doing something else.

Typically, this is where most of us will cite a long list of reasons they didn't shoot well, and I'm not going to do that--I just had a bad day, and that's on me.  However, having admitted that, there are two factors I should mention in the interest of scientific accuracy.  First, the wind was very heavy from 8:00; I doubt that affect the pistol bullets much, but I strongly suspect it did affect the carbine bullets, especially when I tried to aim off to allow for it.  I really think aiming off is the big problem I'm having with most of my rifles--not just the Smith.  My eyesight is bad enough that the hair thin front sight on the Smith is very hard to see, and targets at 50 yards are more even more so.  So when I am aiming off (if you're new to this blog, "aiming off" is the practice of setting your sights on some part of the target other than the bullseye to allow for wind, or drop due to distance, or even offset sights, etc.), it's hard to pick a consistent spot at which to aim, which tends to make the groups open up a bit; I think I need to put an actual mark to aim at on the targets for elevation.  I think if I get a thicker front sight post (to make it easier to see) and one that is taller (so I don't have to aim 12 inches below my intended mean point of impact), I will be able to get *much* better string tests.  The short version of today's results is that if you add all the scores together, my result was a disappointing 5.2 inches/round with the Smith carbine today; compare that with my average score of 2.94 in./rd. in November.

Second, I was unable to set up my pistol targets at 15 yards as I usually do, and had to shoot at 25 yards instead, so naturally the groups opened up a bit from my usual results.  If you add the strings for all four tables of pistol fire, you end up with an average of 3.2 inches/round, which, given the 2.5-3.0 inches/round I've been averaging at fifteen yards isn't really that bad (unless you compare it to my all-time best of 1.7 in./rd.!).

By the way, if you're not yet familiar with the String Test method for gauging accuracy, you are really doing yourself a disservice.  The String Test is a way of calculating the average distance of each round from the bullseye.  It is vastly superior to simply calculating the group size since group size doesn't take into account how close the group is to what you're trying to hit, whereas the string test takes both ideas--the tightness of the group and how close that group is to what you're trying to hit-- and condenses them into a single number that can be precisely tracked and used to gauge how well you're doing, or how a specific load changes things, etc.  To learn more about the String Test, read this.

The weather was dry and sunny, 44 deg., wind heavy from 8:00.  All shooting was offhand, 50 yards for the Smith and 25 yards for the Remington New Model Army.

The Smith carbine cartridges were loaded with greased Smith bullets cast in a mold from Eras Gone Bullet Molds and 35 grains of Schuetzen 3F powder.  To learn how they were made, read this.

The revolver cartridges were combustible paper cartridges made with Kerr bullets from an Eras Gone mold with 25 grains of either Pyrodex "P" or Schuetzen 3F (and yes, I forgot to write down which batches where which for comparison, and I am kicking myself about that lost opportunity for comparison!).  To learn how they were made, read this.

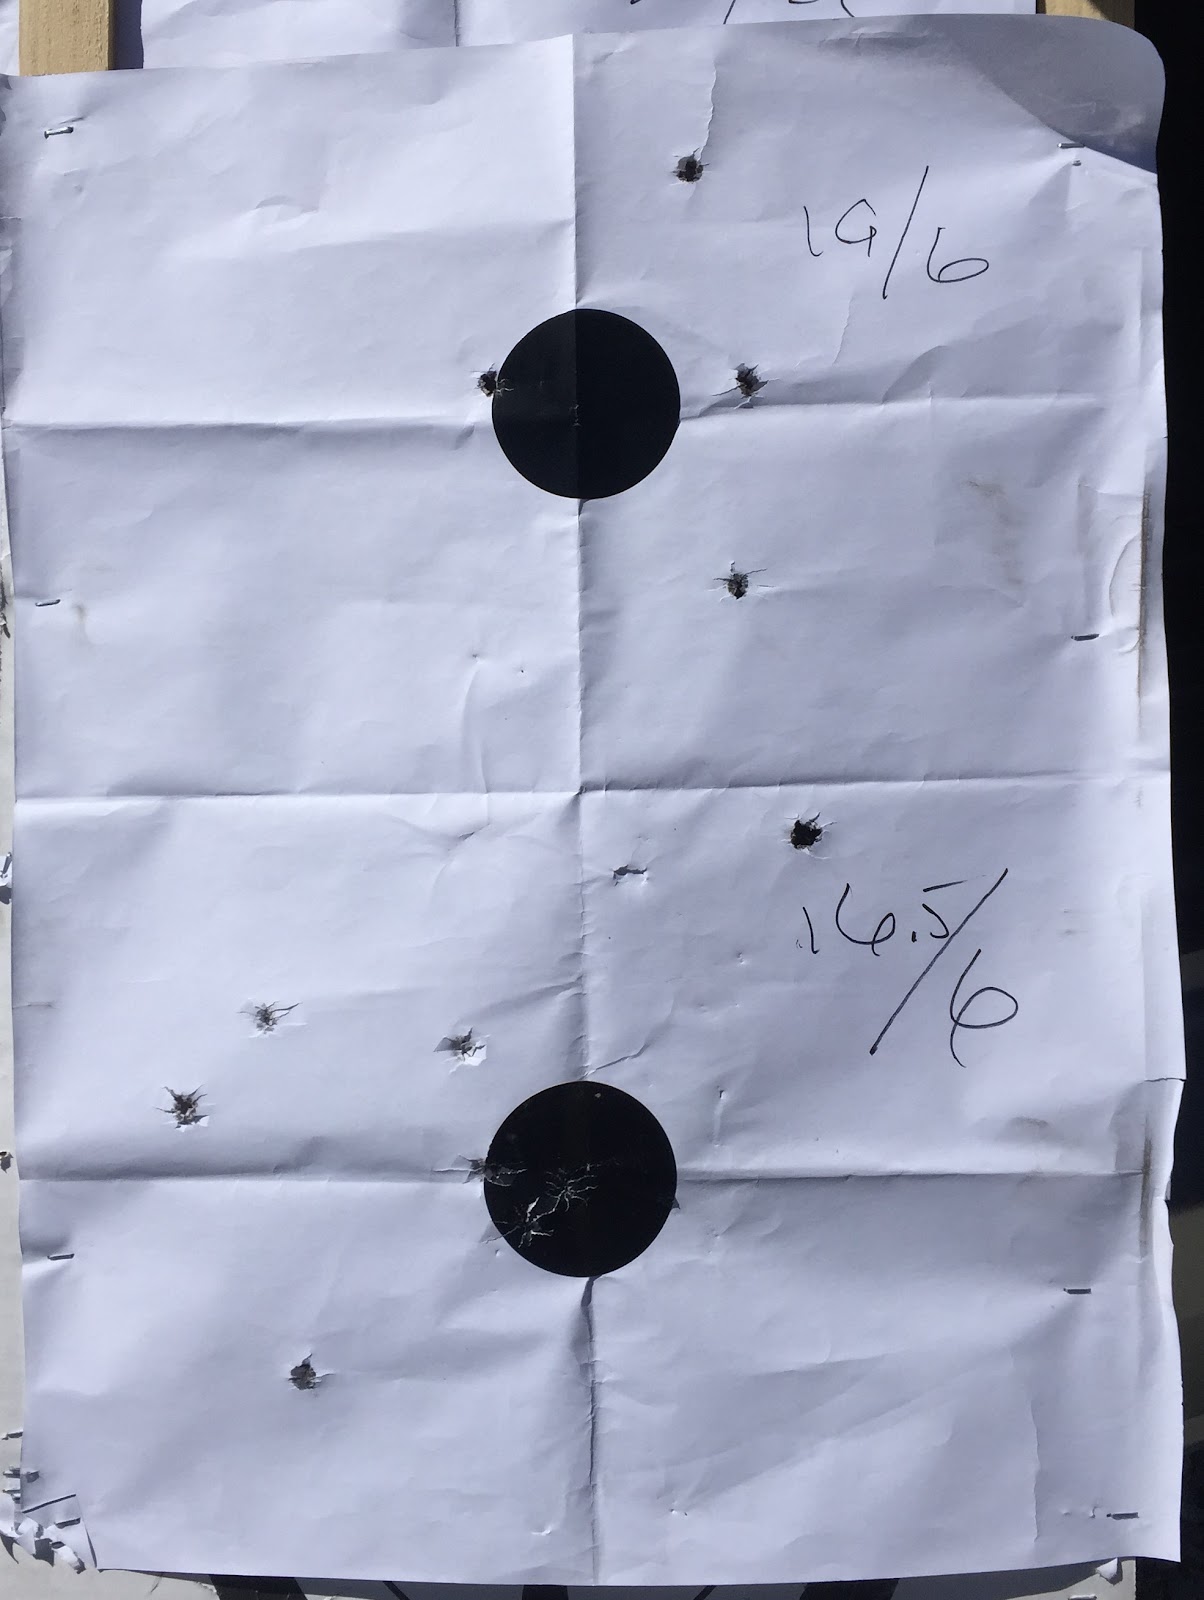
The targets in the pictures below are 18"x24", and the black dots are 3" in diameter, just for comparison.

Table One--Smith
Table One:  Smith Carbine
String Test:  10 rounds, 38 inches = 3.8 in./rd.

Tables Two and Three--Remington
Table Two:  Remington New Model Army
String Test:  5 rounds, 15 inches = 3.0 in./rd.

Table Three:  Remington New Model Army
String Test:  5 rounds, 20 inches = 4.0 in./rd.

Table Four--Smith
Table Four:  Smith Carbine
String Test: 10 rounds, 42 inches = 4.2 in./rd.

Tables Five and Six--Remington

Table Five:  Remington New Model Army
String Test:  6 rounds, 19 inches = 3.2 in./rd.

Table Six:  Remington New Model Army
String Test:  6 rounds, 16.5 inches = 2.7 in./rd.

Table Seven--Smith
Table Seven:  Smith Carbine
String Test:  13 rounds, 90.5 inches = 6.9 in. rd.
(NB:  I wasn't cleaning my barrel, and it is possible the fouling by this point was causing my results to get worse.)


Thursday, February 17, 2022

Book Review: Making the Skin Cartridge by W. J. L. Schroeder


People who study the development of firearms sometimes pay scant attention to the development of ammunition, and yet the two are intrinsically linked.  Ammunition, especially that intended for military use, went through numerous iterations as people tried to find ways to make ammunition that was inexpensive, easy and fast to load, and accurate.  In addition, military ammunition needed to be durable enough to store, transport, and to be handled by soldiers in rough field conditions.

In the mid-nineteenth century flintlocks could still occasionally be seen, and breech-loading metallic cartridge weapons were starting to appear, but the majority of firearms of the period were cap locks.  Cap lock firearms have an external nipple or cone set into the chamber.  A percussion cap is placed onto the cone and a hammer strikes the cap, igniting the powder and discharging the weapon. 

Early cap loader ammunition for the military was little different from that used in flintlocks:  A paper cartridge held a greased bullet and loose powder; the paper was ripped open, the powder poured loose into the bore, and the bullet (still sometimes wrapped in paper) was forced down onto the powder with a ramrod.  This process was tedious and uncertain, but the introduction of combustible cartridges changed things for the better.  Typical combustible cartridges had an envelope of combustible material which was filled with powder and then glued to the rear of a bullet.  Combustible cartridges were significantly easier to use because the entire cartridge was placed in the breech of a weapon in a single unit before being rammed down. 

The majority of military combustible cartridges of this period were made from rag paper soaked in a solution of potassium nitrate to make it burn easily.  These were extremely effective, and the art of making them has resurfaced today among hobbyists interested in black-powder firearms.  Another material used for combustible cartridges was animal intestines, a process far less understood today.  Although somewhat tedious to make, skin cartridges had the advantage that they could be shellacked in order to make them somewhat waterproof.  This material was never common, but we know it was used, and now, thanks to Making the Skin Cartridge by W. J. L. Schroeder, we know how to do it. 

Mr. Schroeder has a lifetime of firearms experience, a fact his book demonstrates plainly.  In it, he gives detailed and insightful instructions for making skin cartridges which will enable a reader who already understands black powder firearms and combustible cartridges to recreate this fascinating style of ammunition.  He explains how to select, acquire, and prepare the intestines; how to form them into sheets of the correct size; how to form them into shells; how to fill them with powder and bullets; and how to shellac them for storage.  He provides numerous tips and tricks for making the process work and for correcting problems that arise during manufacture.  This book contains all the information needed to make skin cartridges that will work perfectly in cap lock rifles or pistols, resurrecting a fascinating lost art. 

It must be noted, however, that Making the Skin Cartridge was written for people who already have experience with black-powder firearms and with making paper cartridges; it is not a book for novices.  Mr. Schroeder does not give detailed instructions for making the formers needed to make skin cartridges (although he provides several pictures of the ones he uses), nor for the details of filling them, such as appropriate cartridge loads.  Other reviews I have read criticize this lack, but such criticisms reflect more upon the modern “do everything for me” attitude of the reviewer than on the value of Mr. Schroeder’s work.  Skin cartridges should be seen as an advanced skill, and the author makes that plain in his introduction. 

In addition to the information about making skin cartridges, Mr. Schroeder includes a number of small articles about various areas of interest, some related to firearms and some not, including cast bullets, lubrication, barrel problems, and cartridge loading issues.  He also includes a few brief articles about 19th-century areas of interest and a brief but amusing anecdote about a certain crow of his acquaintance.  In a way, these additions give the book something of the flavor of an old “commonplace book.” 

Although well written and engaging, Making the Skin Cartridge evinces some editing issues, including spelling and formatting errors, as well as a few noticeable malapropisms (e.g., “patients” for “patience” in a few places).  It lacks both a table of contents and an index.  Such problems are endemic among self-published books, but as the author points out, he is not a writer, and this is not set forth as a work of high literature.  Rather, the author’s intention was to give those interested in historical ammunition the benefit of his wealth of knowledge and skill acquired over a lifetime of study and practice, and for that, the book serves well—even admirably.  Perhaps its only substantive failing is that it lacks detailed historical documentation about its subject since Mr. Schroeder only addresses the mechanical process of cartridge making. 

This book is self-published by the author.  It is perfect bound, with the binding being well done and serviceable, in a six- by nine-inch format, and is seventy-six pages in length.  The printing is clean and the font is sized well.  The numerous diagrams are easy to understand, and the photographs are fairly small but clear.  It is available from Amazon and from the author.

I heartily recommend this excellent book to anyone with an interest in historical ammunition or firearms, even those who have no intention of attempting to replicate skin cartridges. 

This review is copyright © 2022 by Hugh T. Knight, Jr.  Permission is granted to freely copy and/or redistribute this review provided it is done in whole and includes proper attribution.

Saturday, February 12, 2022

Range Report 12FEB2022: Improved Remington New Model Army

I sent my Pietta replica Remington New Model Army revolver out to a highly skilled gunsmith by the name of Gary Barnes.  Mr. Barnes stripped the nasty plastic finish off the grips, refinished them, did an action job, opened up the loading port to make it easier to load paper cartridges, changed the profile of the end of the rammer to conform to the shape of the conical bullets, adjusted the forcing cone, and reamed the chambers to make them consistent and to get the correct size.  He then re-blued the entire frame and barrel.  It looks fantastic, and the trigger feels amazing.

Upgraded Pietta Remington New Model Army.

I took the piece to the range today to see how it loaded and how it shot.  First, the load.  I use paper cartridges that I make myself.  I cast my own bullets from 100% lead using a historically correct Kerr bullet mold from Eras Gone Bullet Molds, and I make the shells from unbleached coffee filters which have been treated with a super-saturated solution of potassium nitrate.  For more information about how I make and package historically correct ammunition, see here.

A sample Kerr cartridge and the cartridge packages I make to carry them (I don't have Kerr labels yet, unfortunately).

I initially choose the Kerr bullet because of the fact that, among the historically correct bullets currently available, it fits best in reproduction revolvers.  It has worked well for me, but it must be admitted that loading paper cartridges into the revolver was still somewhat difficult--that's the primary reason I sent my piece off to be reworked.  I am pleased to say that after the work Mr. Barnes did loading paper cartridges is now as easy as loading metallic cartridges in a modern revolver.  It is remarkable--they slip straight in with no effort at all.  Moreover, despite the fact that he reamed the chambers slightly, ramming the bullet home still leaves a respectable ring of lead that gets cut off, ensuring that there will be no chain fires.  I cannot express how happy I am with this improvement--paper cartridges are now an order of magnitude easier to use, and I hate using round balls.

Unfortunately, my shooting results are somewhat less thrilling.  I love the trigger now that it has been reworked--it is clean and as smooth as silk without being too light.  Despite this, my scores today were not as good as I had been getting before I sent the piece off.  I do NOT attribute this to the work that Mr. Barnes did; rather, it's been about six months since I last took this pistol to the range, and I think I have gotten a bit sloppy.  My average String Test measurement previously was around 3.4 in./rd., and I had been starting to get measurements in the 1.7-2.2 inches/round range, so today's results represented some unfortunate backsliding on my part.

The String Test:  This is a 19th-century method for determining accuracy.  It is vastly superior to simply determining group size because it takes into account both the group size and the distance of the Mean Point of Impact from the Intended Mean Point of Impact (the bullseye) in a single number which is easy to compare from shooting session to shooting session.  In essence, it gives the average distance of each impact from the bullseye.  For more information about the String Test, see here.

Bullet Energy:  The Kerr bullets come out of the mold at a remarkably consistent 225-grain average.  My chronograph readings were not as consistent as I'd like, but I had a mix of powders being used, including Pyrodex 'P' and Swiss and Schuetzen 3F.  I got a range of bullet velocities from 740 fps to 830 fps., with an average of 783 fps.  This gives an average bullet energy of 306 foot pounds, which is very respectable.

Conditions:
Wind, variable from 12:00 to 4:00, speed light to moderate.  67 degrees and sunny.  All shots made offhand.  Sight picture and alignment:  Full sight, 6:00 hold.  Range:  15 yards.

Table One:
25 grains Pyrodex P.
6 rounds, 22.0 inches.
Sting Test = 3.7 in./rd.

Table One: 3.7 in./rd.

Table Two:
25 grains Schuetzen 3F.
6 rounds, 28.5 inches.
String Test = 4.7 in./rd.

Table Two: 4.7 in./rd.
Table Three:
25 grains Swiss 3F.
6 rounds, 18.0 inches.
String Test:  3.0 in. rd.

Table Three: 3.0 in./rd.

Table Four:
20 grains Pyrodex P.
6 rounds, 24.5 inches.
String Test:  4.1 in. rd.
Table 4: 4.1 in./rd. (NB: The marks on the upper left are not from the revolver.)

To say that I am dissatisfied with these String Test measurements is a gross understatement; I am appalled.  My best shooting to date saw an all-time best score of 1.7 in./rd. (see here) back in April of 2021.  I am unsure of what happened (other than the fact that it's been a long time since I got to do any practicing, which is no excuse).  I will also note that Table Four was shot using cartridges with only 20 grains of powder, and I have noticed in the past that my revolver does not like this load (I had old packages to use up).  Perhaps I just got sloppy.  Still, I wouldn't call these results bad shooting--3-4 inches/round at 15 yards is certainly sufficient for Civil War combat marksmanship.  Having said that, I am ecstatic about the handling of my reworked revolver.  It really would be difficult to express just how much nicer it is to load and to shoot since Mr. Barnes worked his magic on it, and now I just have to buckle down, practice, and get my numbers where they should be.

Friday, December 17, 2021

Cap and Ball Revolver YouTube Playlist for the Historical Shooter

There is a tremendous amount of information about cap and ball revolvers on the Internet, some good, some bad, and some horrible and dangerous.  This is a collection of the most important YouTube videos I have found for historical shooters interested in these weapons.  Most of them are from the Duelist54 page created by Mike Beliveau and the Eras Gone Bullet Molds site created by Mark Hubbs.  Although I have selected the videos I consider to be most critical to the sport, I heartily recommend watching all the videos on both sites.  I have also included videos showing how I load paper cartridges, but these are based on what I have learned from the above-mentioned sources with some additional information from 19th-century sources.

I still see people talking about measuring group size as a gauge of accuracy, but it is a very poor way of doing so.  Anyone who is not yet using the String Test as a way to track shooting results needs to reexamine his life choices and start using this system since it is both historically authentic and far more meaningful and useful than just looking at group size.  To learn more about the String test and how (and why) to use it, go to:
https://historicalshooting.blogspot.com/2020/12/the-string-test-measure-for-historical.html

Prepping a new cap and ball revolver for the range:
https://youtu.be/YmVKUlV1AJc

Modifying the hammers of Colt revolvers to reduce "cap sucking."
https://youtu.be/v4gkJaIQPZo

The gear you need to shoot cap and ball revolvers:
https://youtu.be/fntF7qrE9GY

Loading cap and ball revolvers:
https://youtu.be/SxwcagHRTw4

I've also written a detailed guide for how to load cap and ball revolvers here:  https://historicalshooting.blogspot.com/2023/08/loading-cap-and-ball-revolvers.html

The .44-caliber Kerr bullet:
https://youtu.be/GDtYhG4vKqc

The .36-caliber Richmond Laboratory bullet:
https://youtu.be/EBD-umOjAxY

How I load .36-caliber paper cartridges:
https://rumble.com/v2mvmjq-making-.36-caliber-combustible-revolver-cartridges.html

How I load .44-caliber paper cartridges:
https://rumble.com/v2b5e7s-making-combustible-paper-cartridges-for-cap-and-ball-rervolvers.html

Making combustible revolver cartridges with the CapandBall.com cartridge former:
https://youtu.be/6f5r898zwNE

Nitrating paper for combustible cartridges:
https://youtu.be/AQAxp8dUiJQ

Greasing combustible cartridges:
https://youtu.be/BgeAPKKMf4A

Making greased wads for cap and ball revolvers:
https://youtu.be/YgNVPC2wmWI

Shooting combustible cartridges in cap and ball revolvers I:
https://youtu.be/4vx_nQphKO4

Shooting combustible cartridges in cap and ball revolvers II:  Note that in this video Mr. Beliveau suggests that to grease his paper cartridges he had to roll a thin bead of beeswax and force it into the grease groove of the bullet.  This was not how it was done in period and is not a very good technique; this is an old video, and much has been learned since then.  See the video above about greasing combustible cartridges for a better, more historical technique, and the one that Mr. Beliveau uses now.
https://youtu.be/wgBcutYobRs

Civil War pistol cartridge pouches:
https://youtu.be/0hC1r_ad1Zc

Saber belts and holsters:
https://youtu.be/ijt464O_s-I

Civil War cartridge bundles:
https://youtu.be/ffjLU4hxh6c

Tools for working on and shooting cap and ball revolvers:
https://youtu.be/WS3QRSXm3zs

Modifying cap and ball revolvers to accept paper cartridges:
https://youtu.be/Gq3S-g7Br_8

Disassembling and cleaning Colt cap and ball revolvers part one:
https://youtu.be/2qtMkLGdZA4

Disassembling and cleaning Colt cap and ball revolvers part two:
https://youtu.be/057mS44KLCA

Disassembling and cleaning Remington cap and ball revolvers part one:
https://youtu.be/ui5uXl33n8g

Disassembling and cleaning Remington cap and ball revolvers part two:
https://youtu.be/wzs3xYeTERc


Sunday, November 7, 2021

Range Report 11-7-21 Smith Carbine


I shot three tables of fire with my Pietta reproduction of a Smith Carbine today with some pretty good results.  I adjusted the position of the front sight, and this seems to have helped enormously, which explains why the numbers here are better than I have had in the past (well, that and more practice, of course).

An interesting improvement for today’s shooting session was that instead of taping over the backs of the cartridges, I now insert a small disk of nitrated filter paper inside the bottom of the cartridge to prevent powder loss, and it worked marvelously, without a single misfire.  I am very pleased with this improvement as the tape was unsightly and historically inaccurate.

Weather:  Dry and clear, 61 degrees, wind variable from 4:00 to 2:00 at ~11-15 mph.
Range:  50 yards.
Position:  Seated unsupported.
Sight picture:  Full sight, 6:00 hold six inches below the bull. 

I used .50-caliber bullets I cast myself using an Eras Gone bullet mold, which I sized to .515 inches.  These were loaded over 35 grains of 3F Schuetzen powder in a plastic case from Northeast Trade Co.  I used CCI 4-prong musket caps.  For information about how I load and package these cartridges see here.

Unfortunately, the picture I took of the target for Table One didn’t come out, so my readers will have to take my word for it.  Note that Tables Two and Three were fired with a revolver, which explains why these go from One to Four.  For reference, the circle on the targets is 3 inches in diameter.

Table One (No Picture)
10 rounds
String test:  33.5 in. = 3.35 in./rd.


Table Four

Table Four
10 rounds
String test:  22.25 in. = 2.22 in./rd.


Table Five

Table Five
10 rounds
String test:  32.5 in. = 3.25 in./rd.

The String Test is a 19th-century method for determining accuracy.  It is vastly superior to simply determining group size because it takes into account both the group size and the distance of the Mean Point of Impact from the Intended Mean Point of Impact (the bullseye) in a single number which is easy to compare from shooting session to shooting session.  For more information about the String Test, see here.

Interestingly, I deliberately did not clean the carbine at all during the shooting process just to see what would happen.  I normally clean the bore with a wet followed by two dry patches after every table of fire.  The only result I found was that the lever used to open the action got harder to actuate toward the end of the third table of fire, but accuracy seems to have been unaffected.

Of additional interest, I was able to get my chronograph working and so was able to check the speed of my rounds for the first time.  I still can’t make it work with my phone, but I was able to read the numbers off of the screen and write them by hand.  The speed of the bullets in this test varied from 852 to 881 fps, with an average of 872.86 fps.  Using the average bullet weight of 360 grains (the nominal weight is 354 grains, but mine come out slightly heavier), this gives a muzzle energy of 608.89 ft.-lbs.

As always, I am very appreciative of the historically accurate bullet mold made available by Mark Hubbs at Eras Gone Bullet Molds, they make the entire shooting process significantly more authentic.  These molds, and many others for historical shooting, can be found here.

Range Report 14JUN2026: Comparing the Smith and Burnside Carbines

I spent my Sunday at the Church of the Holy Black Powder.  Among other things, today saw a head-to-head comparison between my Burnside and S...