The Revolver Manual of Arms
 |
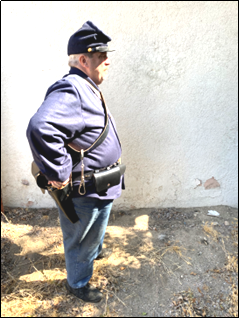
| My belt kit. |
Militaries always appreciate uniformity of both equipment and procedure because it simplifies both training and logistics, so modern militaries develop a manual of arms to govern the use of each weapon they issue. This term applies both to the physical books in which the procedures were written and to the actual processes for using the weapons described therein.
For the historical shooter, manuals of arms are more than simply a way to practice shooting as it was done in his period of interest; by reading between the lines of the text it is possible to learn a great many things about how the weapons and equipment worked, were used, or were carried at the time, as we will discuss below. We will focus here only on those portions of the manuals of arms which apply directly to shooting.
Manuals of arms were usually very precise, detailed procedures showing an ideal evolution—one which was not always expected to be followed perfectly in actual combat, but which served to make training uniform in order to help soldiers build the muscle memory necessary for using their weapons under the stress of combat. The evolutions were usually numbered in step-by-step order to make them easy for an instructor to call out to formations, even though some steps might be combined in actual practice. The evolution below is taken verbatim from the revolver manual of arms in Cooke’s Cavalry Tactics of 1864 (pp. 56-57 and 93-94) and includes the commands instructors would call out for each step.
Military commands are usually given in two parts: A “preparatory command” and a “command of execution,” such as “Platoon—” (the preparatory command warning the unit that they are about to receive a command), “ATTENTION!” (the actual command of execution telling the members of the platoon to come to the position of attention). There is usually a very slight pause between the parts of the command. Not all commands have a preparatory command, however; some, such as “AIM,” are given alone. When soldiers receive a command they are not to move until the command of execution is given (Poinsett 1862 p. 104).
In addition, most multi-part evolutions are described as being done in a specified number of “times,” with the instructor often calling out the number of the part of the action to be performed, such as “Preparatory command” … “COMMAND OF EXECUTION” …”TWO!” … “THREE!” When an evolution is intended to be performed continuously on the soldier’s own initiative it is said to be “in one time,” even if it has several distinct parts. Giving orders “by the numbers” is most often done with raw recruits, but with experienced soldiers the manual of arms evolutions are often performed in one time, even when they have several parts.
Please note that the instructions herein are for dismounted operations only.
Manual of the Pistol
61. The army revolver being worn in a
belt-holster, suspended by the belt at the right side of the back, the
instructor commands:
62. At the command, PISTOL, with the right hand
unbutton the flap of the belt-holster, draw the pistol, and, holding it at the
stock, with the point of the forefinger reaching above the trigger guard, carry
it vertically, with the hand as high as the right shoulder, and six inches in
front of it.
63. The instructor commands:
READY.
1 time.
At this
command, place the pistol in the left hand, at the height of the breast, the
muzzle elevated and directed to the left front, cock and raise pistol (position
No. 62).
AIM.
1 time.
64. At this command, lower the pistol to the front, the arm about three-fourths extended, the forefinger upon the trigger; aim with the right eye, the left eye closed.
[NB: In Congdon’s Cavalry Compendium, troopers are given specific instructions as to aiming: “Lower the pistol, the arm half extended, and place the forefinger lightly on the trigger, the muzzle directed to the height of a man’s waist” (Congdon 1864 p. 97)].
FIRE.
1 time.
65. At this command, fire and raise pistol.
66. At the position of AIM, the instructor may
command, raise-PISTOL, at which command the men raise the pistols to the
position No. 62; and if the pistol is not fired, at the command, return-PISTOL,
first let down the hammer.
67. To cock the pistol rapidly without the use of
the left hand, place the thumb upon and press down the hammer, throwing forward
the muzzle with a rapid motion, to assist the action of the thumb.
68. In a possible case requiring it, the revolver
may be used in rank dismounted with great effect, in firing to the front, or
right or left oblique, by volley or file firing.
To reload,
the rank would be ordered to sit on the ground and load at will.
69. Being at the position of raise pistol, the
instructor commands:
Return—PISTOL
1 Time
At the command, PISTOL, lower the pistol, carrying it to the rear, and return it to the holster, and button the flap.
To Load the Pistol
These instructions come later in Cooke’s manual and cover
loading the revolver while mounted; they are included here because the
dismounted loading instructions given above in paragraph 68 do not go over the
detailed steps required for loading as these do.
177. The horses must be quiet; at the position of
raise pistol, the instructor commands:
Load at—WILL.
1 Time.
At this
command, let the reins rest on the pommel, half cock the pistol, take it by the
stock with the left hand, the guard to the right, and lower it until the hand
rests upon the inner side of the left thigh, the butt of the pistol touching
the saddle, the hand and cylinder resting against the side of the pommel, the
pistol being inclined to the front and right; with the right hand take a
cartridge and place it in the chamber, turn the cylinder and force in the ball;
repeat this until the cylinders are loaded.
Then hold the pistol against the right side of the pommel, pointing
downward, to the right and front, and put on the caps. Take the position raise pistol.
Return—PISTOL.
1 Time.
178. At the command, PISTOL, place it in the holster, and button the flap.
 |
| Ready. |
 |
| Draw--PISTOL |
 |
| Cocking. |
 |
| Raise--PISTOL. |
 |
| AIM and FIRE. |
 |
| Raise--PISTOL. |
 |
| Return--PISTOL. |
Observations on the Pistol Manual of Arms
Note that the position of raise pistol is central to this
evolution; the revolver is intended to start in this position and to return to
it with each shot. This gives a
significant advantage when using cap and ball revolvers, but modern shooters
accustomed to metallic cartridge revolvers often ignore or abbreviate this
action. When fired, the spent percussion
caps are supposed to blow off the nipple and away from the weapon, but they
often fail to do so which can lead to them getting stuck in the action. Returning the revolver to the raise pistol
position between each shot helps spent caps fall out of the weapon without
getting caught in the action, thus reducing cap jams.
Note, too, that when talking about holstering the pistol when it hasn’t been fired in paragraph 65 Cooke does not mention placing the revolver on safe by putting the hammer between chambers before returning it to the holster, he just says to “let down the hammer.” This is extremely interesting—does it represent a lack of concern or an unspoken assumption that soldiers will know to do that? If it hasn’t been fired then simply lowering the hammer would place the hammer on a live cap, which is incredibly dangerous.
Modern shooters sometimes think that the practice of keeping the shooter’s finger off of the trigger until he is ready to shoot is a modern custom, but as paragraph 62 above shows, this is not the case.
Earlier versions of the manual of arms are almost identical to this one except with regards to the loading procedure. As discussed in Chapter Two, the Walker and Dragoon revolvers used cartridges which were not combustible; in those cases, the cartridge was merely an envelope for holding the powder and bullet, much like the musket cartridges of the time, and in Congdon’s Cavalry Compendium the manual of arms clearly refers to this procedure (Congdon 1864 p. 95-96). It is clear, however, that Cooke expected the revolver to be loaded with combustible cartridges as his loading instructions make plain.
One other difference between Cooke’s manual of arms and earlier manuals is that they indicated that troopers should be able to load while on a moving horse (e.g., id. p. 98). As Cooke’s change requiring loading to be done either sitting on the ground or on a standing horse makes clear, loading while moving on horseback is extremely difficult and was found to be impractical. “Reloading a caplock on horseback was difficult, although not impossible, which at least partly explains why men can be seen in Civil war photographs with three or more revolvers thrust into their waist belts” (Walter 2020 p. 104).
Note that the manual of arms specifies that the holster is to be worn at the “right side of the back,” that is, to the rear of the right hip. Revolvers were worn with the butt facing forward, and many people today believe they were worn this way so that the left hand could be used to reach across the body to draw the revolver while the right hand would reach across to draw the sword, allowing the soldier to use his sword in his right hand and his revolver in his left. While there are references to shooting this way, those doing so are invariably officers and the sword is typically being used to signal or guide their men rather than for combat. Cavalry troopers did not wield both weapons at once for the simple reason that sabers were rarely used on foot and, when mounted, one hand was needed to hold the reins. In fact, Whittaker gave specific instructions about how to use the revolver before switching to the saber: “The revolver on the right hip should have a cord fastened to it a yard long. The men should be practiced in firing at a target when passing at speed, and then dropping the pistol on the opposite side, to use the cord while they handle the sabre.” Whittaker 1871 pp. 14-15.
Added to this is the fact that the holster was intended to be worn on the rear of the right hip where it would be almost impossible to reach with the left hand, which makes it obvious that revolvers were not worn butt forward to facilitate drawing the revolver with the left hand. This modern myth has spread by word of mouth without any real research to support it and is without basis. In actuality, military revolvers were worn butt forward because their long barrels made them harder to draw straight out when worn the other way. Some cowboys did use the cross draw, but this was usually done with the holster worn on the front of the user’s left side.
When using the so-called “cavalry twist draw” described here it is important to keep your finger off of the trigger as you draw and to keep the muzzle oriented toward the ground until starting to rotate it up, at which point you do so perpendicular to the plane of your body so that you do not sweep yourself with the muzzle.
These instructions, as detailed as they are, leave out, or are vague on, several issues. For example, Cooke said to “take a cartridge and load it into the chamber,” but was silent as to where the cartridges were. We might presume that cartridges were carried in the pistol ammunition pouch, but typically they were carried there in cartridge packages, not loose; moreover, photographs make it clear that cavalry troopers didn’t always wear a pistol ammunition pouch, especially if they wore the carbine cartridge box. Congdon said to take cartridges from the pouch (Congdon 1864 p. 95), but this may reflect the fact that Congdon was referring to non-combustible cartridges, which were less delicate, however, Cooke does not mention it. This suggests that combustible cartridges may have been taken directly from the cartridge packages, which could have been opened and then set on the ground (note that the dismounted loading instructions call for loading while seated on the ground) or on the saddle in front of the rider when mounted.
When cartridge pouches were not worn, cartridge packages may have been carried in a haversack, in saddle bags, or in pockets, etc., and removed for loading. This would not be problematic since, unlike the carbine, pistols were probably not reloaded during combat which meant the trooper would have time to pull out the ammunition for loading without the need for having it on his belt.
Balanced against this, Whittaker does say to load by taking
combustible cartridges out of the pouch, which suggests not only that cartridge
pouches were worn, but that the cartridges were carried loose in them which suggests
they may have been dumped into the pouch from the packets:
The instructor then commands, LOAD BY THE MOTIONS. (Colt's.). Motions: 1. LOAD. At this word carry the left hand to the lever, the pistol at a raise, and halfcock with the right thumb. 2. Take two or three cartridges from the pouch, insert one in the chamber with the fingers, revolve the cylinder till the load comes under the lever. 3. Ram it down and catch up the lever. 4. Put in a second cartridge. 5. Ram it down; and 6,8,10, and 12, insert cartridges; 7,9,11, and 13, ram them. 14. Cap the cones, after which come to a ready. Whittaker 1871 p. 119.
Percussion cap management is likewise vague. Troopers wore cap pouches on their belts, but presumably these were used to hold the larger caps used for their carbines. Pistol caps are much smaller, and experimentation has shown that it is difficult to reach into the cap pouch and pull out a small pistol cap when there are carbine caps in the pouch as well, moreover, when removing carbine caps it is almost impossible to avoid inadvertently pulling out pistol caps as you do so, which invariably fall to the ground and are lost. These problems suggest that small cap tins may have been carried separately, perhaps in the haversack or in a pocket or even in the cap pouch with the carbine caps, and that caps may have been loaded from these tins. Some manufacturers made blocks to hold the cartridges which had a separate slot or opening for percussion caps (Thomas 2003 pp. 129-130) and when using those no separate tin would have been required, however, most blocks were not so equipped.
Of course, officers would not have had these difficulties
since they didn’t carry long arms. They
probably did carry pistol cartridges in the pistol cartridge pouch and pistol
percussion caps in the cap pouch.
Works Cited
Congdon, James A. Congdon's Cavalry Compendium. Philadelphia: J. B. Lippincott & Co., 1864.
Cooke, Phillip. Cavalry Tactics, or Regulations for the Instruction, Formations, and Movements of the Cavalry of the Army and Volunteers of the United States. New York: J. W. Fortune, 1864.
Walter, John. Weapons of the Civil War Cavalryman. Oxford: Bloomsbury Publishing Plc, Kindle Edition, 2020.
Thomas, Dean S. Round Ball to Rimfire: A History of Civil War Small Arms Ammunition. Part Three, Federal Pistols, Revolvers & Miscellaneous Essays. Gettysburg: Thomas Publications, 2003.
Whittaker, Frederick. Volunteer Cavalry: The Lessons of the Decade. New York: Self-Published, 1871.


No comments:
Post a Comment